Roster
The Roster section allows you to perform the onboarding and proctoring tasks for the events. Once the operational staff confirms the Event Offers, you can view these confirmed Event Offer’s ID in the Roster window.
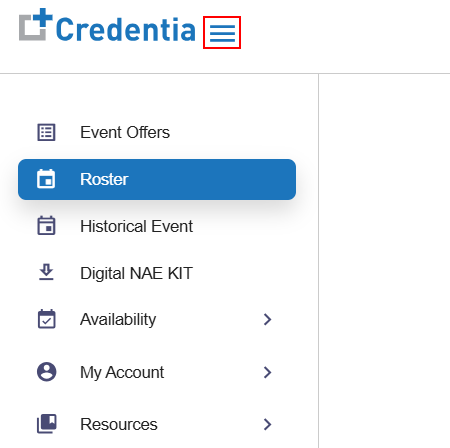
To view the Roster page, follow these steps:
- In the left-side navigation menu, select Roster from the dropdown.
- Select the date of the exam from the calendar icon. Then select the Event ID from the dropdown list. Finally, click on the Check In button.
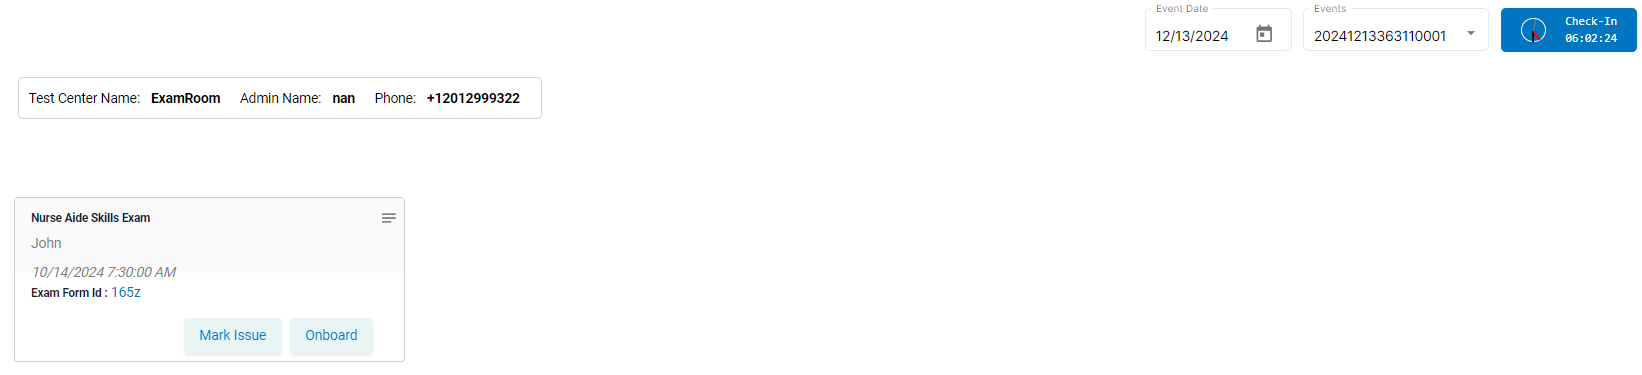
Now you can view the details including exam type, candidate’s name, date, time, and Exam Form ID of the event. Before starting the exam, you should board the candidates.
NOTE
- Make sure that you check in before starting onboarding.
- Candidates perform five (5) skill tests, and they have 30 minutes to complete the task.
Marking an Issue
The Mark Issue button on the candidate tiles allow you to notate the reasons why an exam has not been taken or closed early.
To notate, follow these steps:
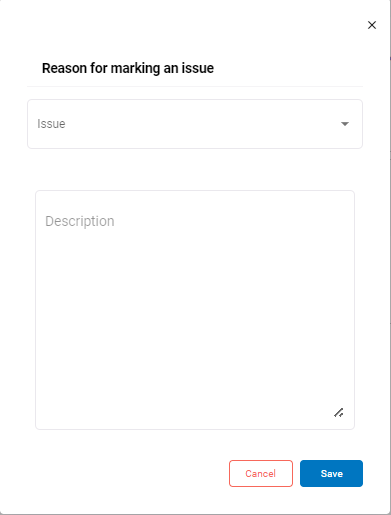
- Click Mark Issue button on the candidate tile.
- Click Mark Issue in the candidate tiles.
- Select Issue from the dropdown list mentioned below:
- Absent
- Failed Health Screening
- Turn Away - Not Candidate Fault
- Other facility issue
- Turn Away - Candidate Fault
- Relationship
- Wrong ID
- Language Issue
- Accommodation
- Health
- Enter the Description.
- Click Save to save the issue.
OR
Click Cancel to exit the issue window.
Onboarding the Candidate
To onboard the candidates, follow these steps:
- Click Select Event ID and select the required event ID from the dropdown.
- Click Onboard to onboard the candidate.
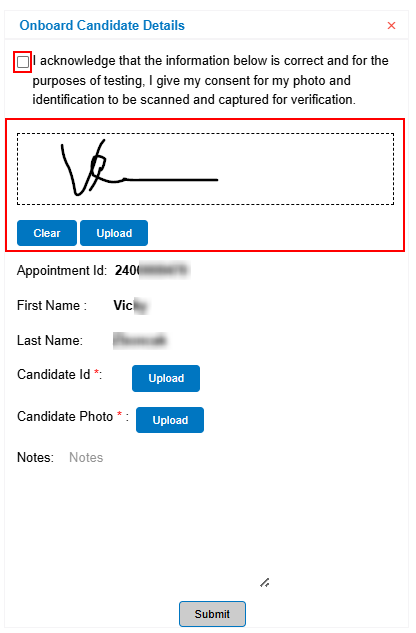
- Hand the tablet to the Candidate so they can check the box for onboarding consent and sign in. Click on Upload to capture the signature for the candidate.
- Check and confirm the candidate’s Appointment ID, First Name, and Last Name.
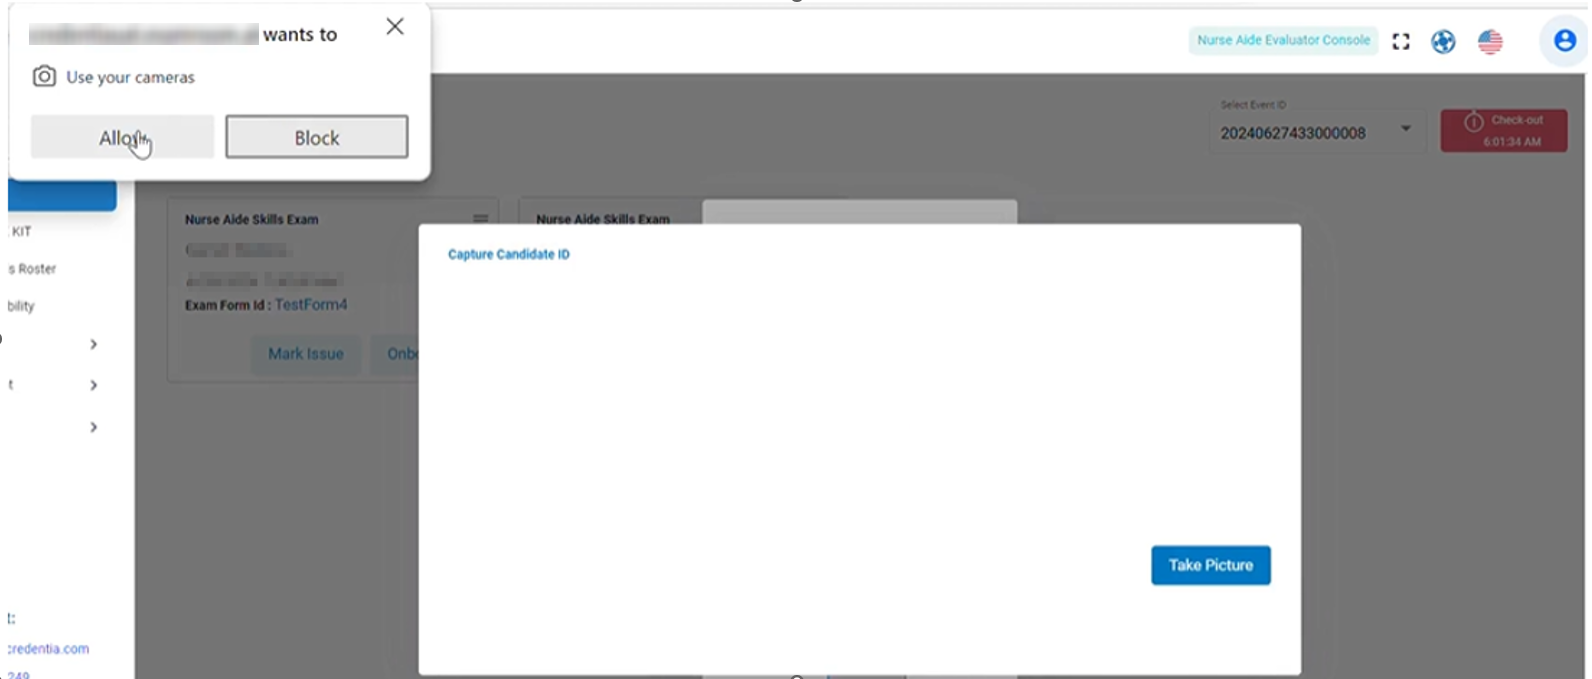
- In the Candidate ID field, click Upload.
- Click Allow to access the camera and click Take Picture.
- Show the candidate’s ID in front of the camera and click Take Picture.
- Click Upload to upload the candidate’s ID. If you want to retake the picture, click Retake.
- Follow the above steps to upload the Candidate Photo.
- Add Notes, if any.
- Click Submit to complete the onboarding.
Proctoring
Once you complete the onboarding process, you can start proctoring for the candidates.
To start proctoring, follow these steps:
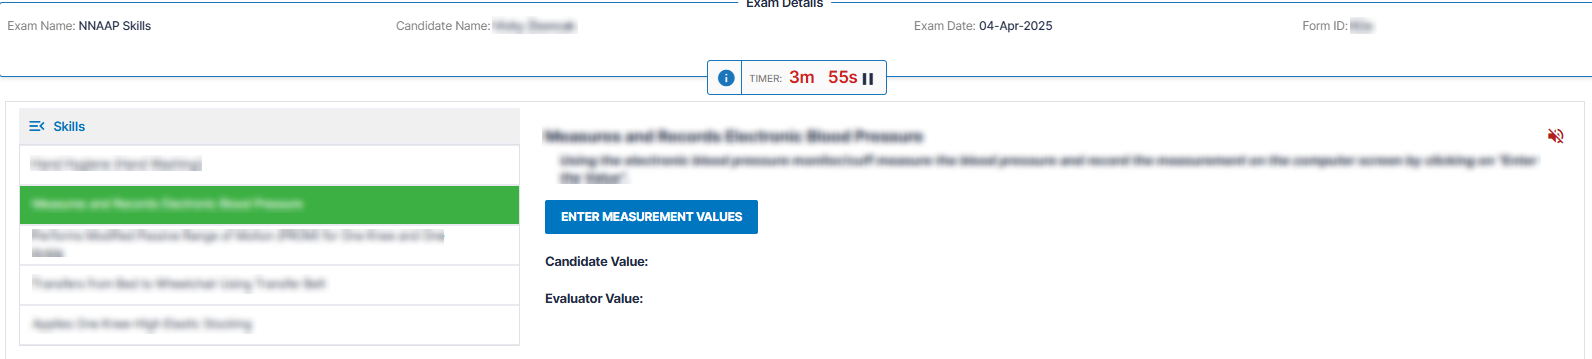
- Click Start Proctoring. A new window displays the Exam Details, Candidate Name, Exam Date, Form ID, and List of Skills.
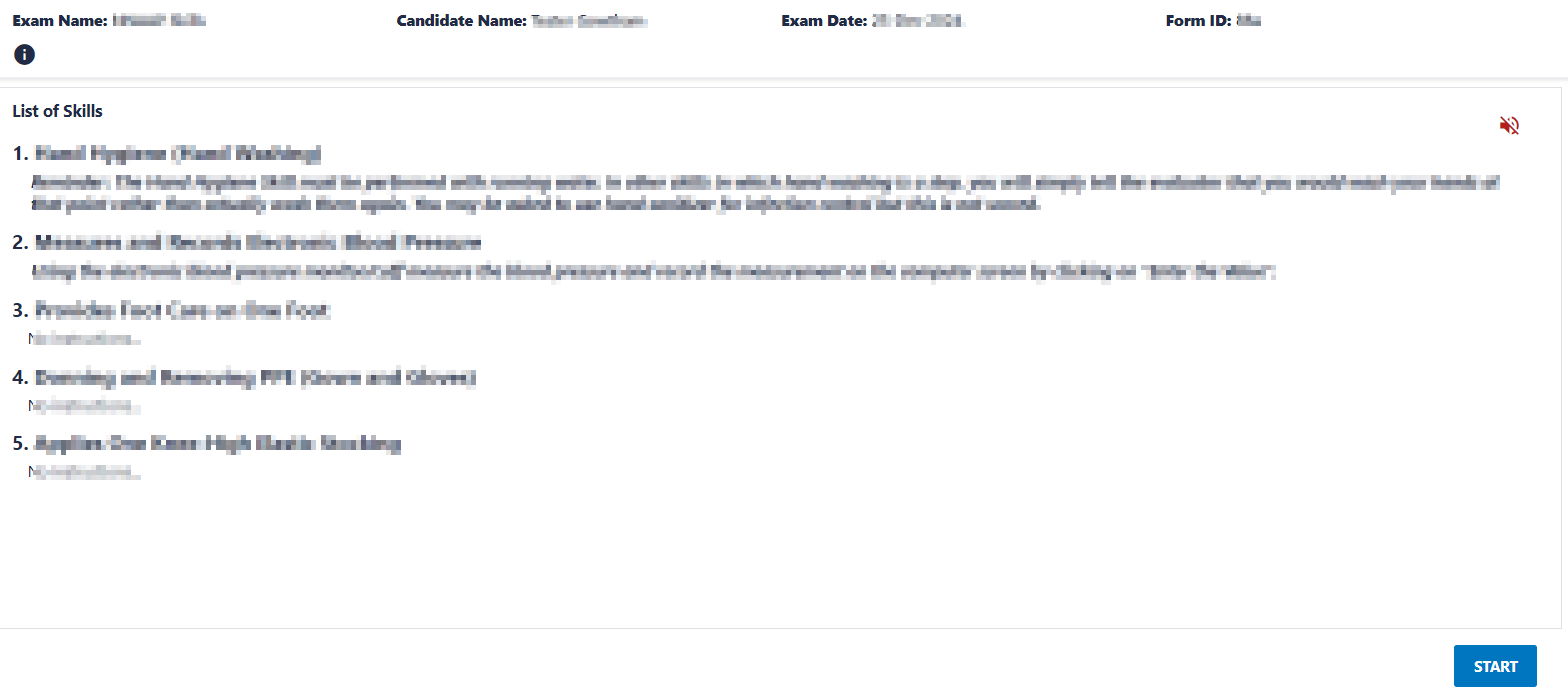
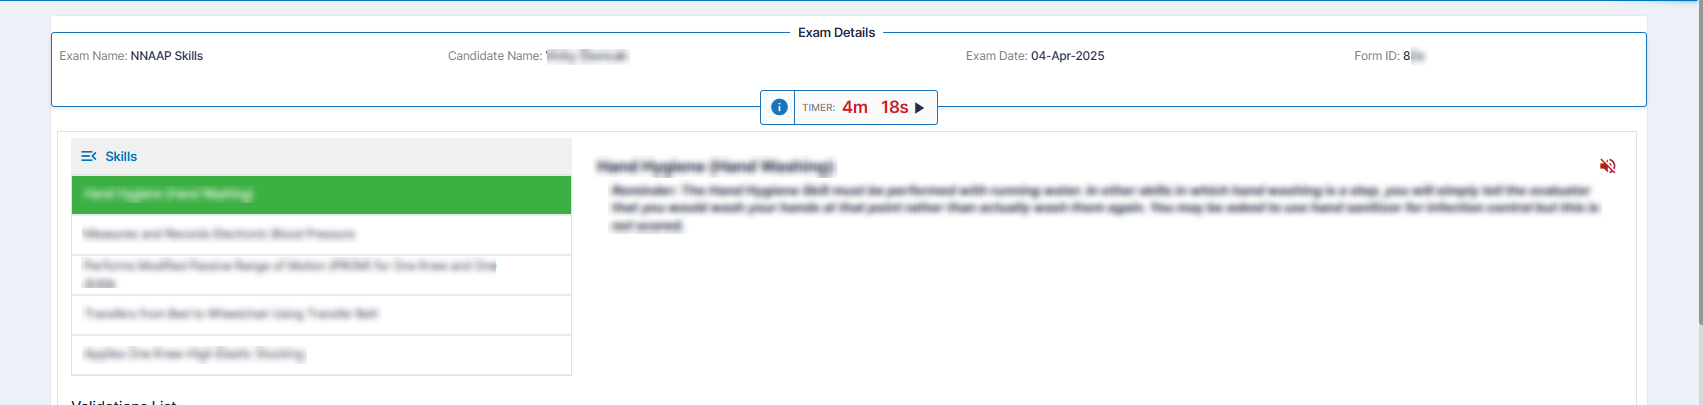
- Click Start to start the proctoring. The Proctoring window displays the list of skills on the left side and the corresponding instructions for each skill on the right side.
NOTE- Check the reminder mentioned in the skills for your reference.
- Instruct the candidates about the exam duration before starting the exam.
- You can pause and resume the exam by clicking the Pause and Resume button at the top of the window.
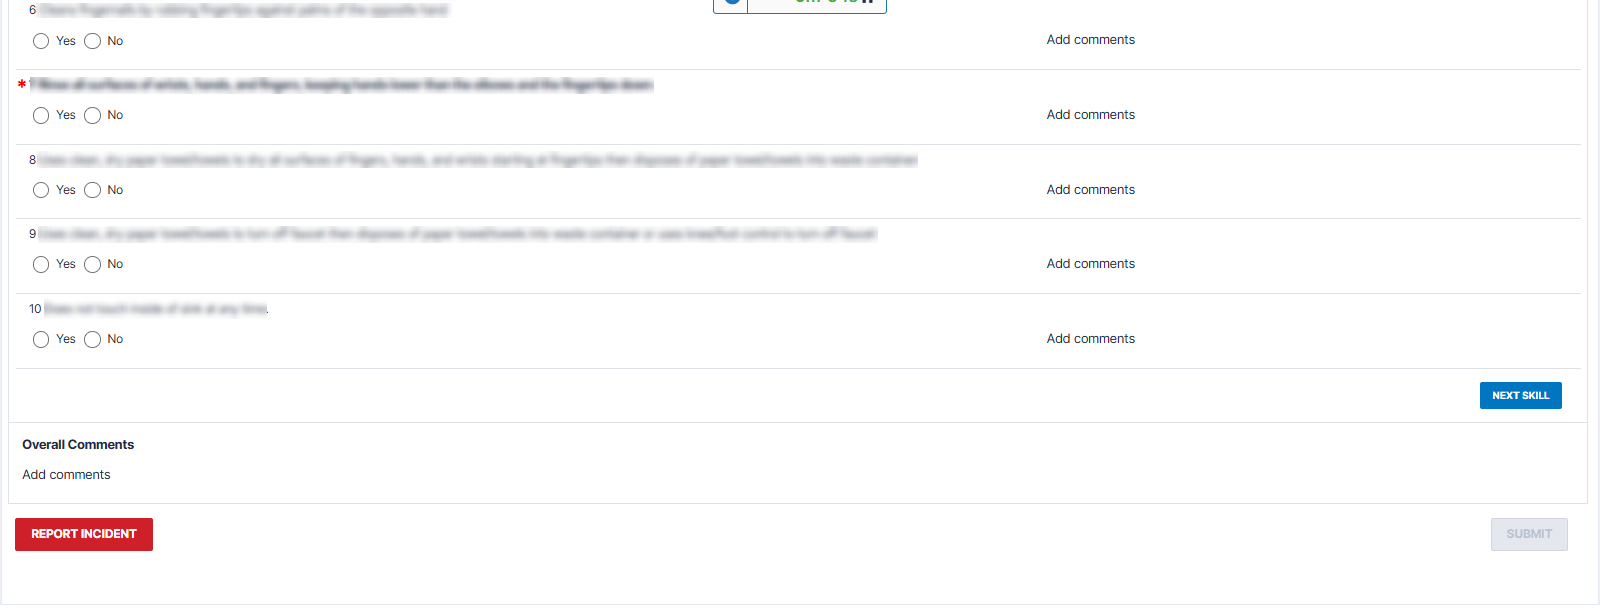
- You must validate the mandatory steps, which are highlighted in bold.
- Once candidates start the test, you should validate each step by updating the Validation List.
- To update the Validation List, select Yes or No for each corresponding step:
- Select Yes if the candidate performs the step correctly.
- Select No if the candidate does not perform the steps or performs them incorrectly.
- If you select No, click Choose an Incident, and select the options from the dropdown.
- Did not perform the step.
- Step performed incorrectly.
- In the Add Comments field, enter your comments about the incident.
- Once you complete the validation of the first skill, click Next Skill to go to the next page.
- Enter Overall Comments, if required.
- Once the candidate completes all five (5) skills, click Submit.
- After submitting the test, you will be redirected to the Roster Page.
- In the Roster page, select the Event ID from the dropdown that you submitted.
- Click Start Proctoring and follow the same steps for the next candidate.
- Once you complete the event for all the candidates, click Event Complete to close the event.


NOTE: Make sure that you check out after the event is completed.
Enter Measurement Value
Some skills may require the candidate to measure and record the values, such as the client’s weight. The Enter Measurement Value option allows to record of those values.
NOTE: Check for the instructions in the question to see if it is necessary to perform any task on your part.
To record the measurement value in the system, follow these steps:
- Click the Enter Measurement Value button.
- Provide the computer to the candidates and instruct them to perform the below steps:
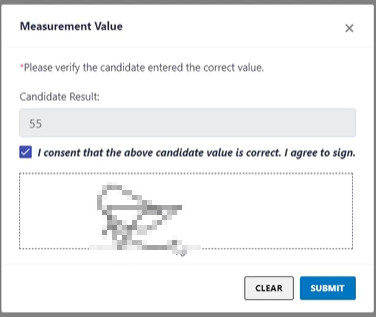
- Enter the values in the Candidate Result field and click Submit.
- After submitting the values, select the check box and enter the signature in the Signature Here field.
- Click Submit to save the values.
Note: Use the Clear option to clear the Signature Here field.
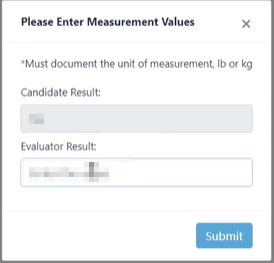
- Once candidate values are submitted, get the system from the candidate and record your values in the Evaluator Result field.
Safety Stop
During Skill 23, if needed, you can initiate Safety Stop.
To initiate Safety Stop, follow these steps:
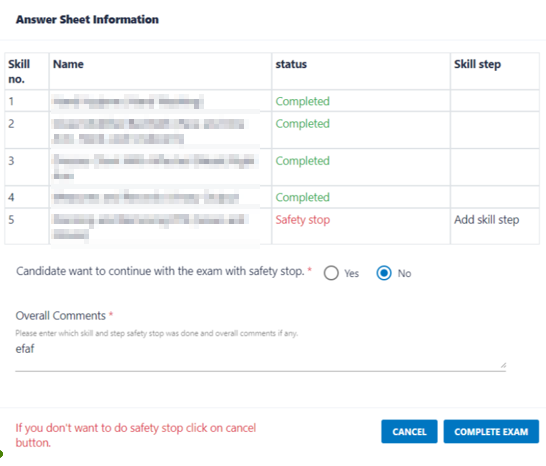
- Click Safety Stop. The Answer Sheet Information Window will be displayed.
- In the Add Skill Step field, enter which skill step safety stop was done.
- If the Candidate wants to continue with the exam with a safety stop:
- Select Yes if the candidate wants to continue with the exam, enter the Overall Comments, and click Continue Exam.
- Select No if the candidate does not want to continue with the exam, enter the Overall Comments, and click Complete Exam.
OR
Click Cancel to exit the window.
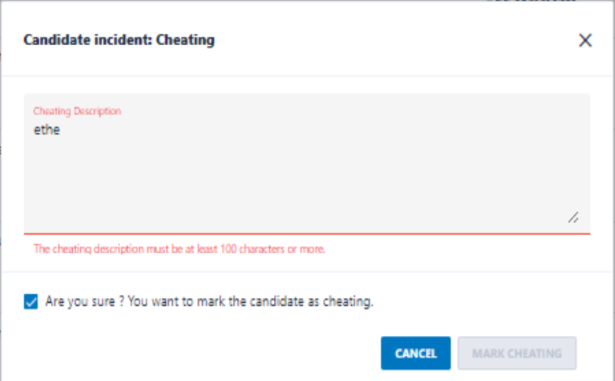
Cheating
If you find that the candidate is cheating during the exam, you can mark Cheating and stop the exam immediately. Once you mark the exam for cheating, the candidate receives an automated email notification.
To mark cheating, follow these steps:
- Click Cheating at the bottom of the Validation List page.
- In the Cheating Description field, enter your comments.
- Select the check box corresponding to Are you sure? You want to mark the candidate as cheating.
- Click Mark Cheating.
OR
Click Cancel.
NOTE: The cheating description must be at least 100 characters or more.