How to schedule an exam?
Looking to become a CNA faster? With Credentia, you can now schedule your online written exam and test from the comfort of your home — as soon as the next day! Online exams give you flexibility and speed, all at the same cost as in-person testing.
Plus, to help you feel fully prepared, online practice exams are available so you can get comfortable with the format ahead of time. Take control of your path to certification and get started today!
To schedule your exam, you must have an approved “Application” where you register and declare your account with your eligibility route, enrollment, and other details. Go to the application section in the Credentia Platform to check the status of your submitted new application. See here. If you want to know how to submit a New Application. See here.
You can schedule your exam by logging into the Credentia Platform using your registered account.
The following are the steps to schedule your exam:
Step 1: Log in to the Credentia Platform
Visit the credentia.com website, navigate to the login page provided on the site, and enter your registered email address and password to log in.
Step 2: Navigate to the exam schedule section
Click on the Exam Schedule provided on the side menu.
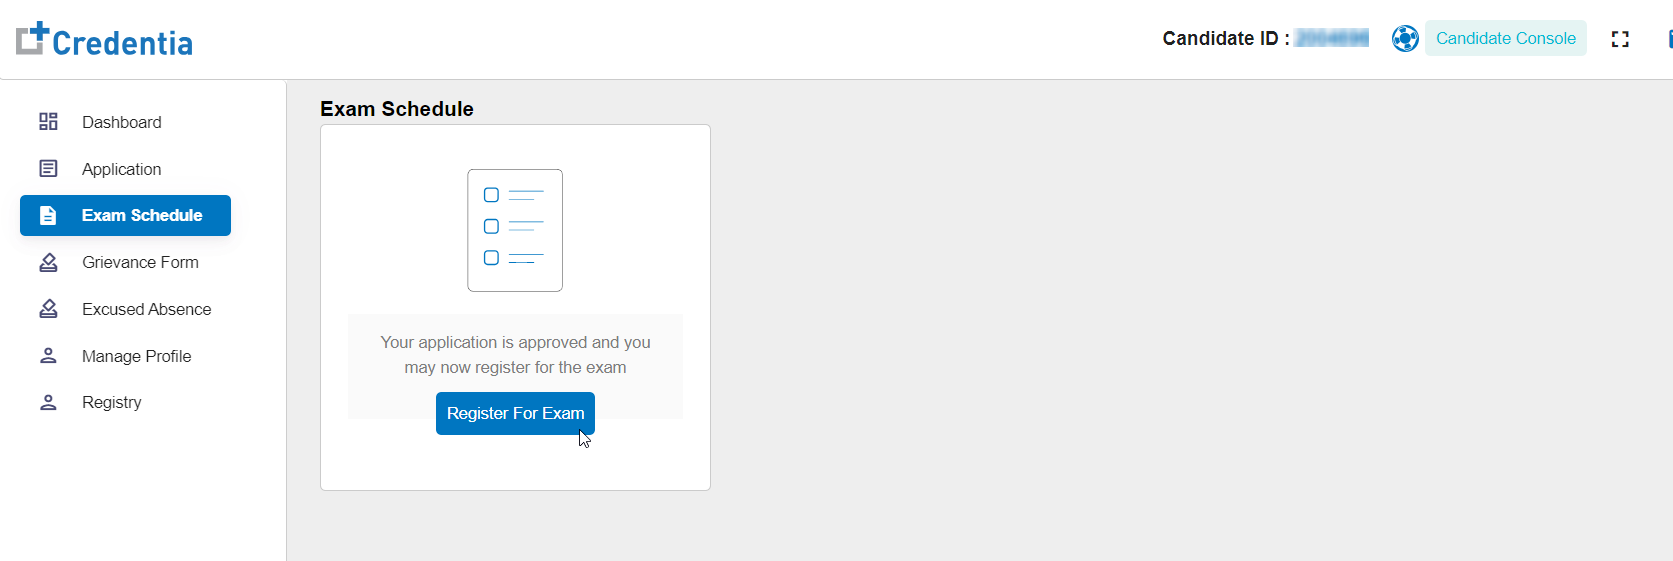
Step 3: Select register for exam button
Click the “Register for Exam” button to schedule an exam.
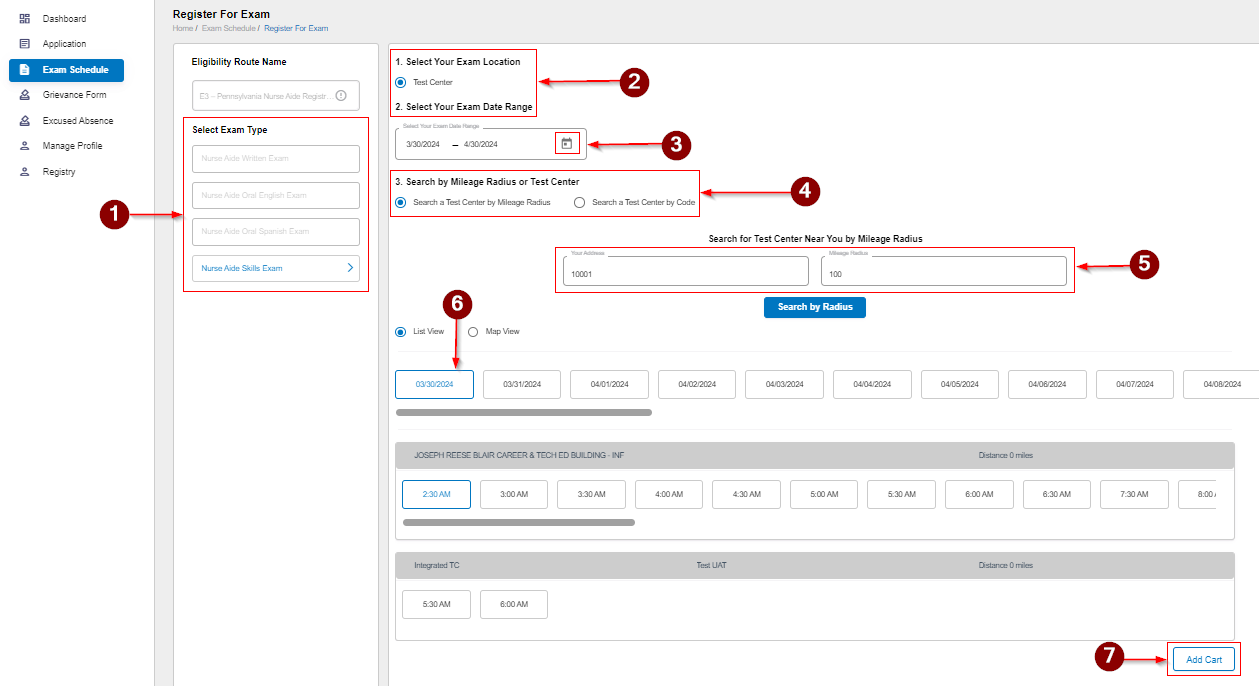
Step 4: Choose the exam type
Click on an exam type provided on the left section of this page to choose an exam type to schedule.
Step 5: Choose online or at the test center
Click on the radio button to choose your preferred location for the exam, you have two options Online or at a Test center.
Note: The online exam option is only available for certain exam types and test center options may vary by state.
Option-A: If you choose the online
- Enter Your Time Zone and your preferred date to find an available slot.
- Use the exam range filter to find the best exam slots.
Option-B: If you choose the test center
- You have the option to select a date range section, you must Select a Date Range when you would want to find an exam slot.
- This filter will assist you in conducting a custom search using a mileage Radius or a Test Center Code. After adding the date range, you can custom search using a Mileage Radius or a Test Center Code. Note - the test center code can only be applied for an INF, and you will given this code by your Training Institute. Once you have added your filter preference, click Search.
Step 6: Choose a slot from the result
The result shows only available slots for the selected filter option. Choose a slot from the result to proceed.
Step 7: Select the Add Cart option
You must Click on the “Add Cart” button to save the selection and pay for the exam.
Step 8: Complete the payment process
- Once you have successfully added your selection, click the cart icon to complete the payment process.
- Ensure you have the correct selection on the cart and click the Pay Now button.
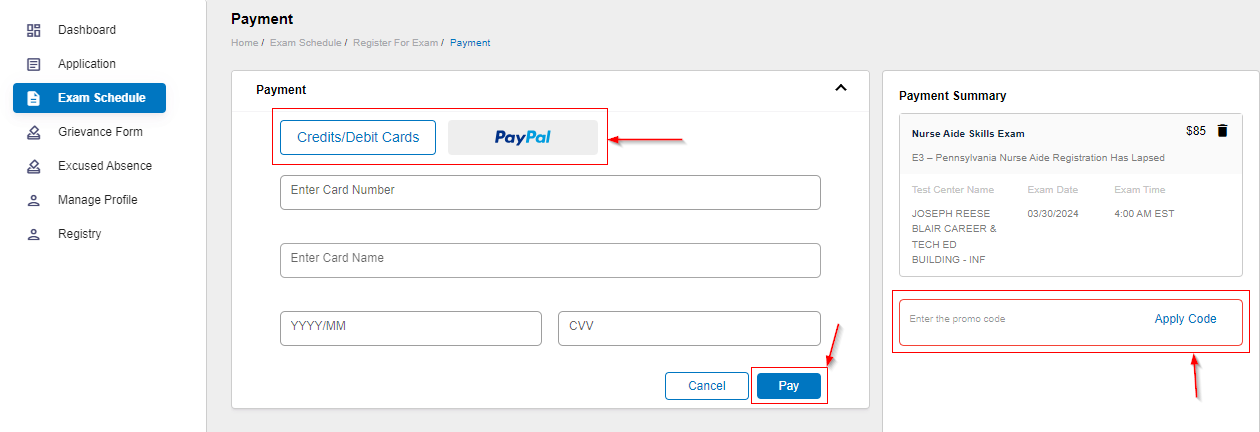
Option-A: Pay using a credit/debit card or PayPal
- On the payment page, fill in the payment details of your credit/debit card.
- Click the “Pay” button to complete and send the request.
- To make a payment with PayPal, simply click on the PayPal button. This will open a pop-up window containing the PayPal login page, where you can easily complete the payment process.
Option-B: Use voucher to complete payment
- If you have a voucher, it can be used towards payment to finalize scheduling.
- Enter the voucher number in the promo code section and click Apply code.
- Once applied, click the schedule button to complete.