Manual Invoices
The Manual Invoices section allows you to add and view your manual invoices. You can reimburse your bills that are not covered by standard event reports. After uploading the related documents, operation staff will verify and process your bills for payment.
The Manual-Invoices are displayed in the tabular format, where you can view the status, Submitted Date, Total, and Extracted Date.

| Field or Icon | Description |
| Status | Provides you with the status of your invoices Submitted – When the manual invoices are submitted for approval. Rejected – When the manual invoices are rejected by the accounting team. Holding Approval – When the manual invoices are on hold. Approved – When the manual invoices are approved. Paid Extracted – When the manual invoices are approved for payment. |
| Submitted Date | Displays the date on which the invoices are submitted. |
| Total | Displays the total amount mentioned in invoices. |
| Extracted Date | Displays the approval date of your invoices. |
Adding a Manual Invoice
To add a Manual Invoice, follow these steps:
- Click Add Manual Invoice on the Manual Invoices page.
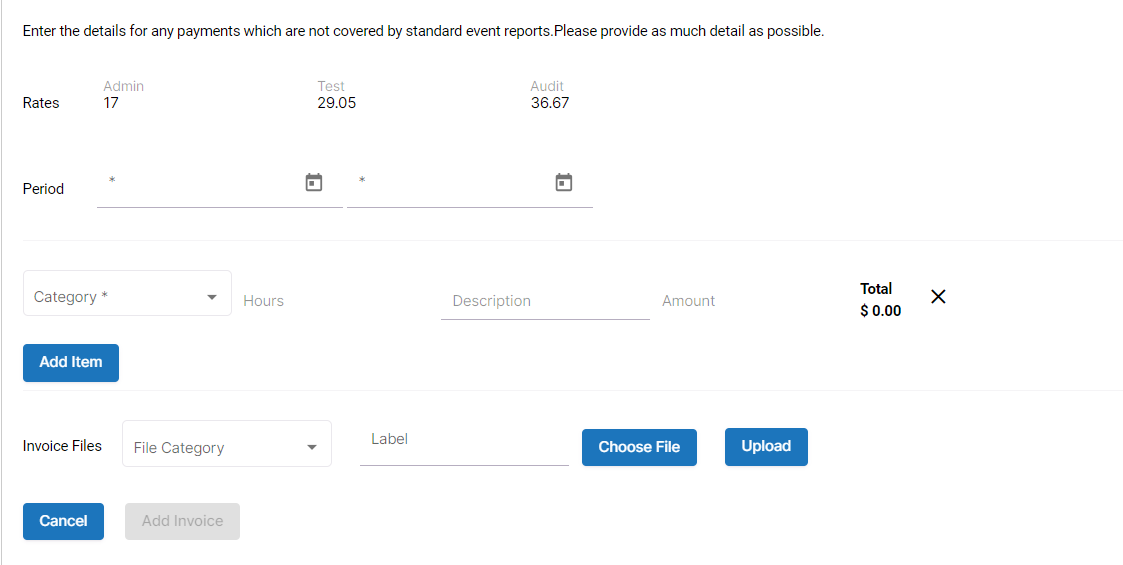
- You can view the standard rates for the Admin, Test, and Audit.
- In the Period field, click Calendar icon to select the start and end date.
- Click Add Item.
NOTE: You can add multiple items. - Select Category from the dropdown list.
- Flat Pay
- Pre-Test Prep Cancelled Event
- Facility Audit
- Expenses Cancelled Attended Event
- Referral Bonus
- Trivia Winner Bonus
- Grievance
- PO Box Expense
- Admin Time
- Expenses Unscheduled Event
- Hourly
- Expenses Unscheduled Event
- E-Learning
- Onboarding HostExpenses Onboarding
- Cell Phone Stiped
- Misc Bonus
- Fill in the red highlighted tabs such as Hours or Amount and Description.
- In the Invoice Files field, select File Category from the dropdown.
- Enter Label.
- Click Choose File and select the File Name from your desktop.
- Click Open and click Upload to upload your files.
- Click Add Invoice.
OR
Click Cancel to exit the window.

