Exam Day - Online Exams
What are the required procedures to initiate and successfully complete an online examination?
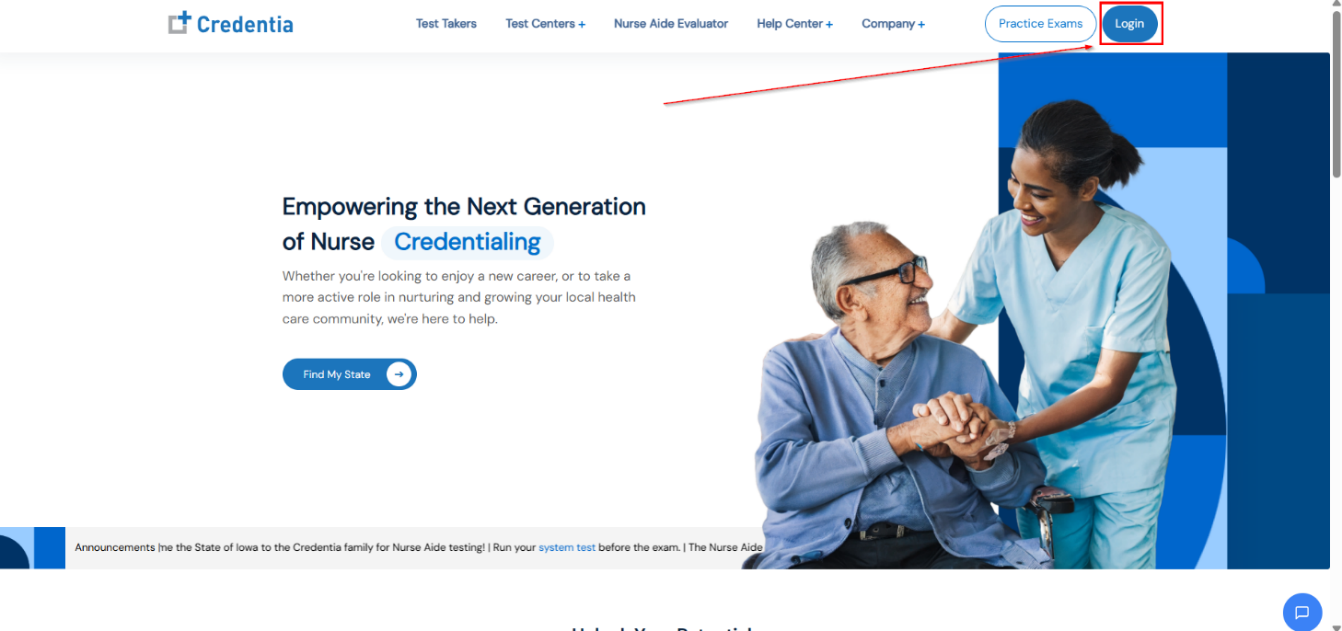
Getting to Your Exam
Logging in for the Online Exam
- Go to credentia.com.
- Click the Login button in the top right-hand corner of the screen.
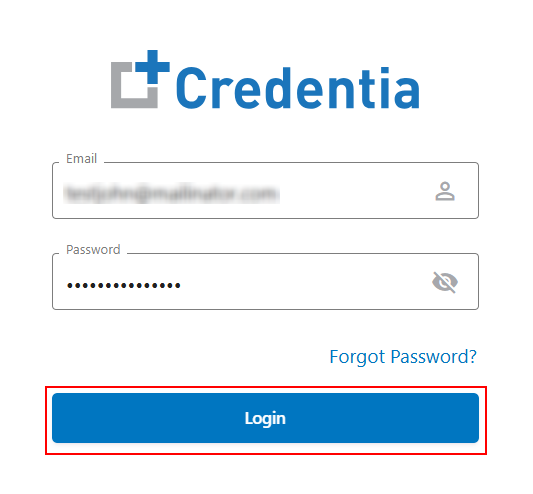
- Enter your login credentials and click Login.
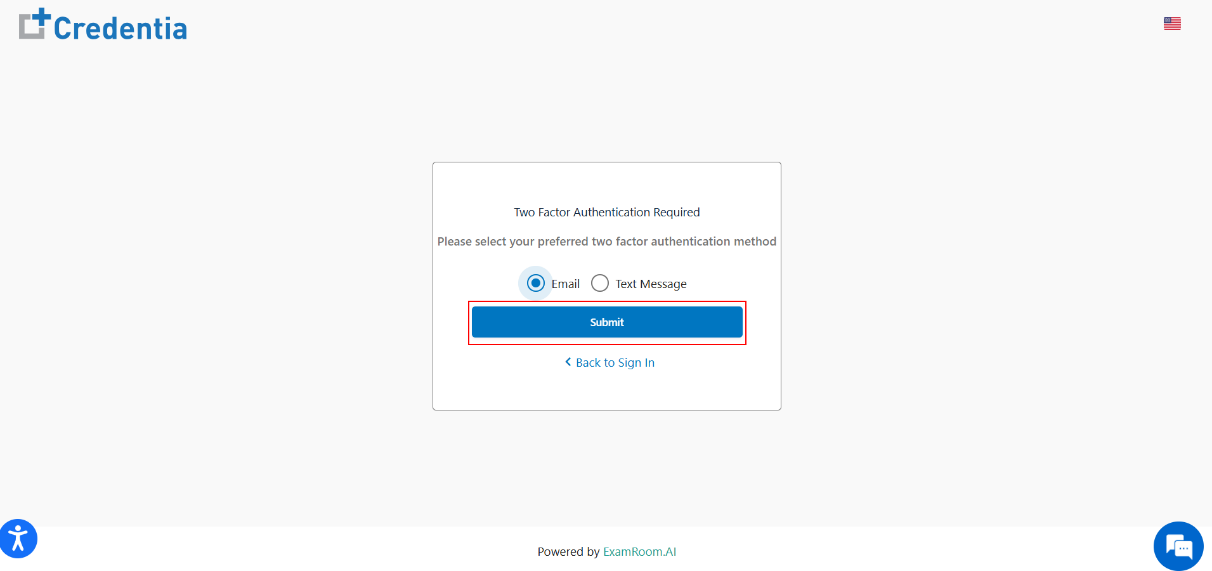
- If two-factor authentication is enabled, select the verify option for Email or Text Message and click Submit.
- Go to your email or text messages for the one-time password (OTP).
- Enter the OTP in the verification code field and click Submit.

Starting the Exam
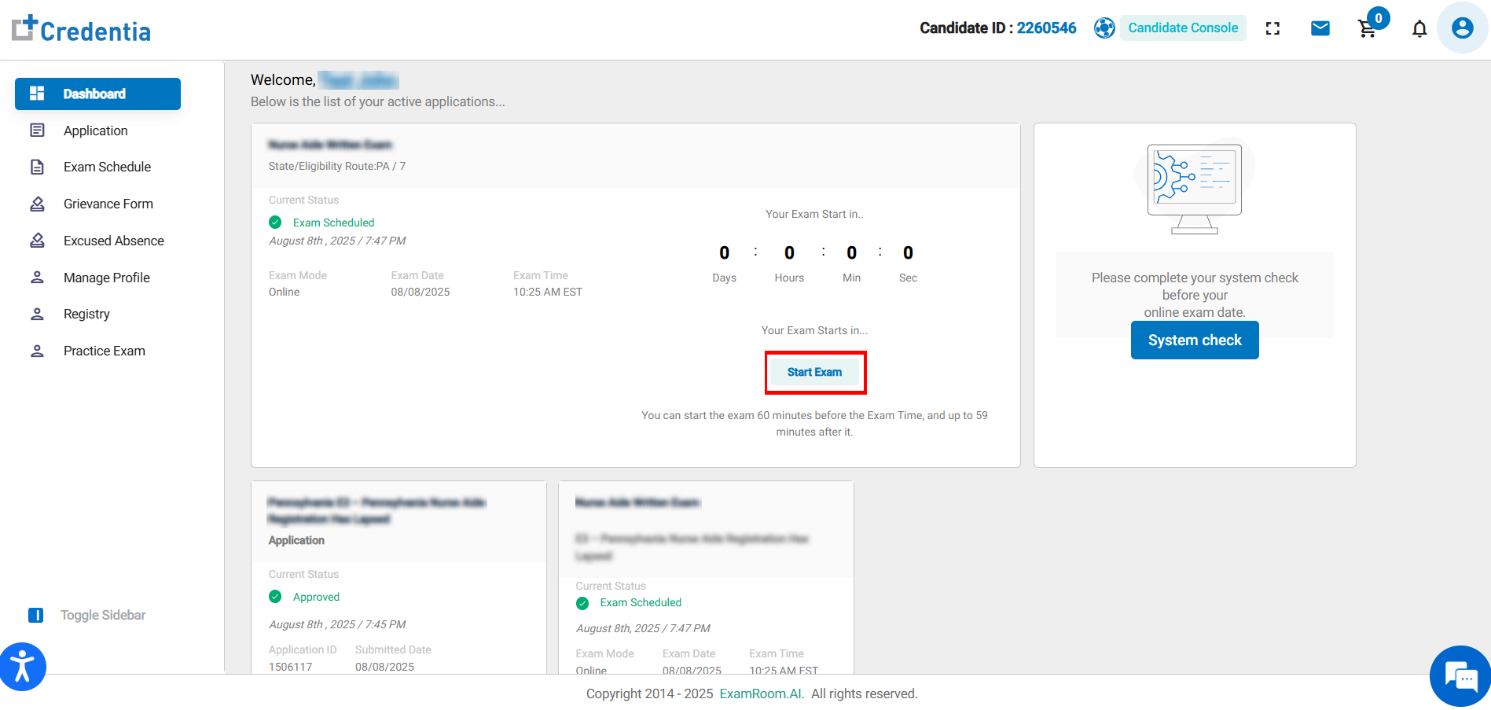
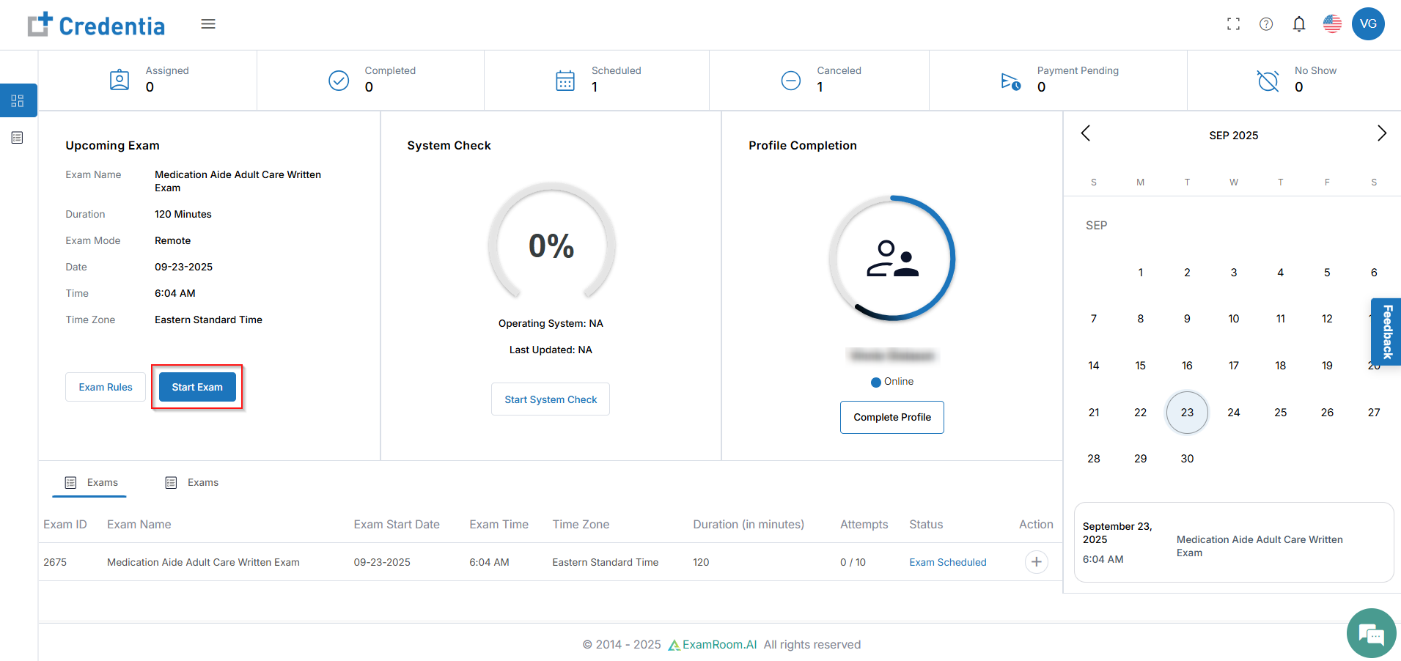
From the Candidate Dashboard, please follow the steps below to start the online exam:
- To begin your online exam, click on the Start Exam button on your dashboard.
Note: On the day of the exam, you can start fifteen (15) minutes before your scheduled exam time. - A test conducting console will open in a new window. Click Start Exam again.
Adding Examlock Lite – Extension
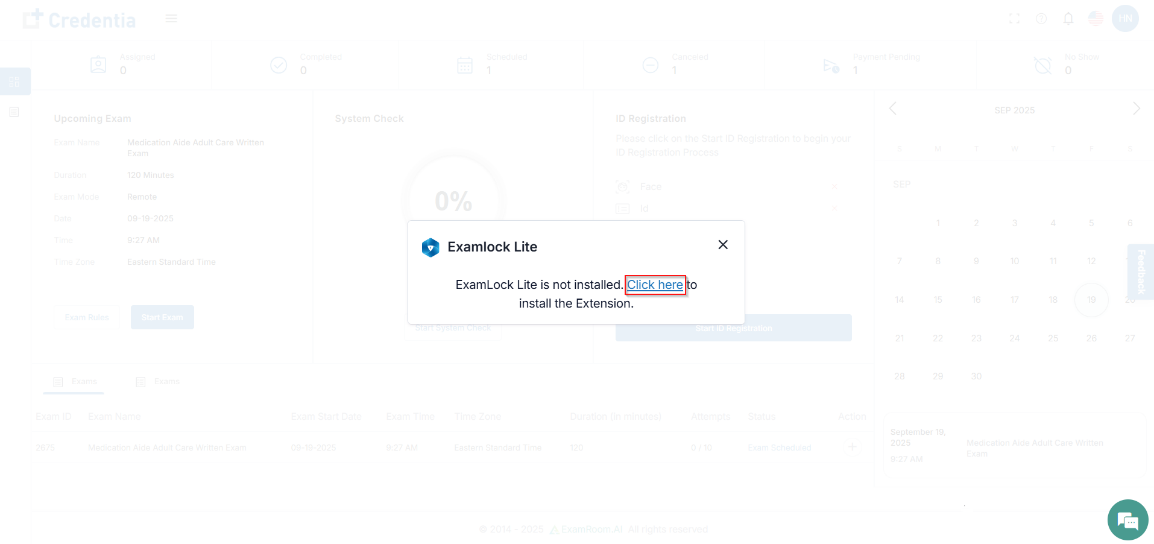
- If you have not installed the Examlock Lite extension, you will get a pop-up to install the extension before proceeding to start the exam. Make sure you install and proceed with your exam.
- Click the Click here link provided on the pop-up to install the extensions to the browser.
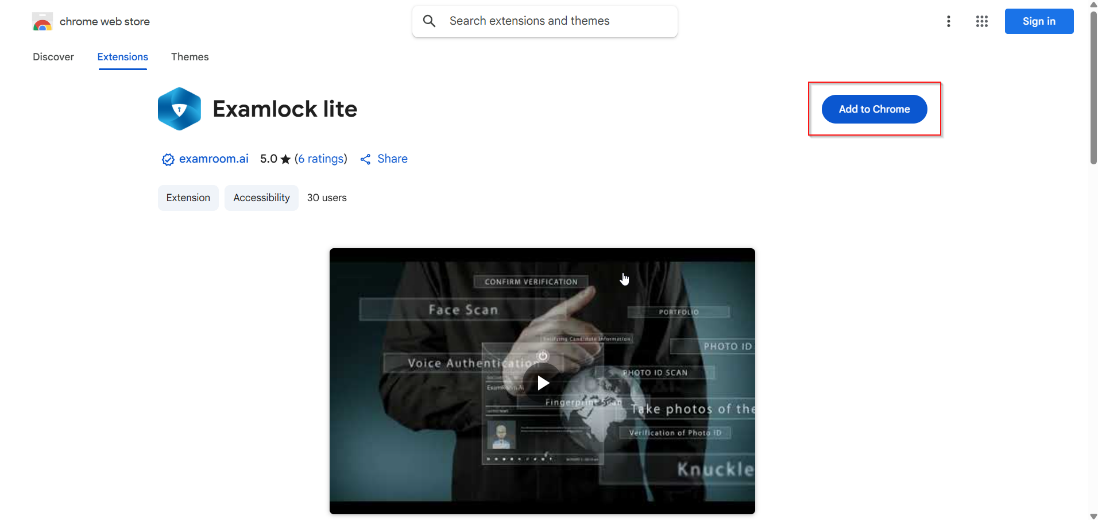
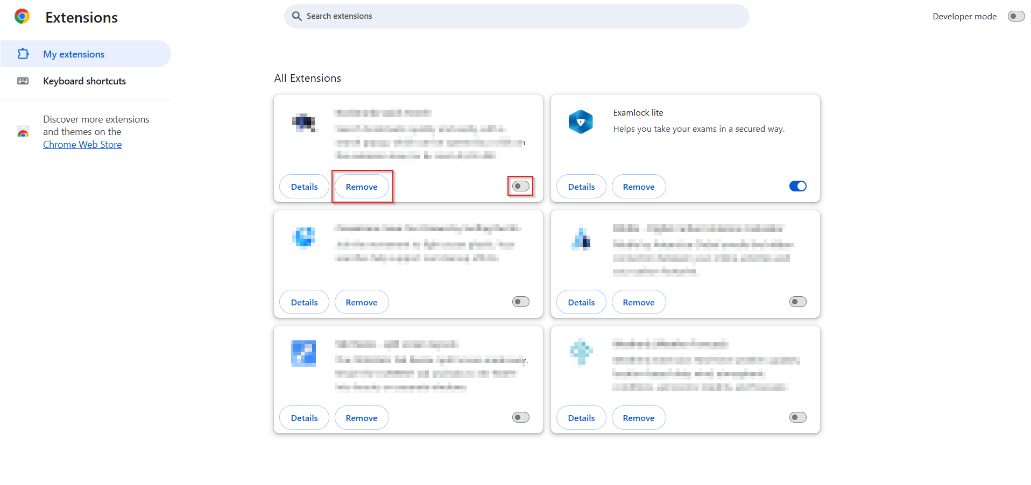
- The Extensions window opens to add the Examlock Lite extension.
- Click Add to Chrome.
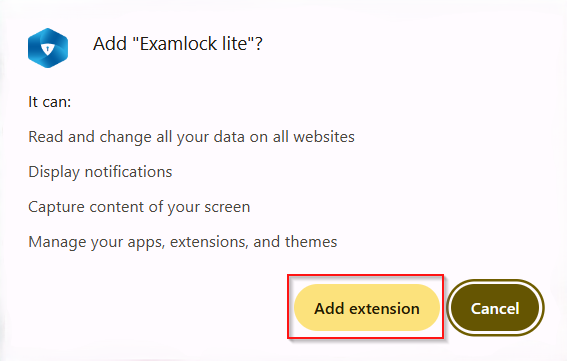
- Click Add Extension to confirm, enabling your browser to be exam-ready for the fair proctoring session.
Info: You can uninstall the extension as soon as the exam is completed.
- Click Add to Chrome.
- Click the Click here link provided on the pop-up to install the extensions to the browser.
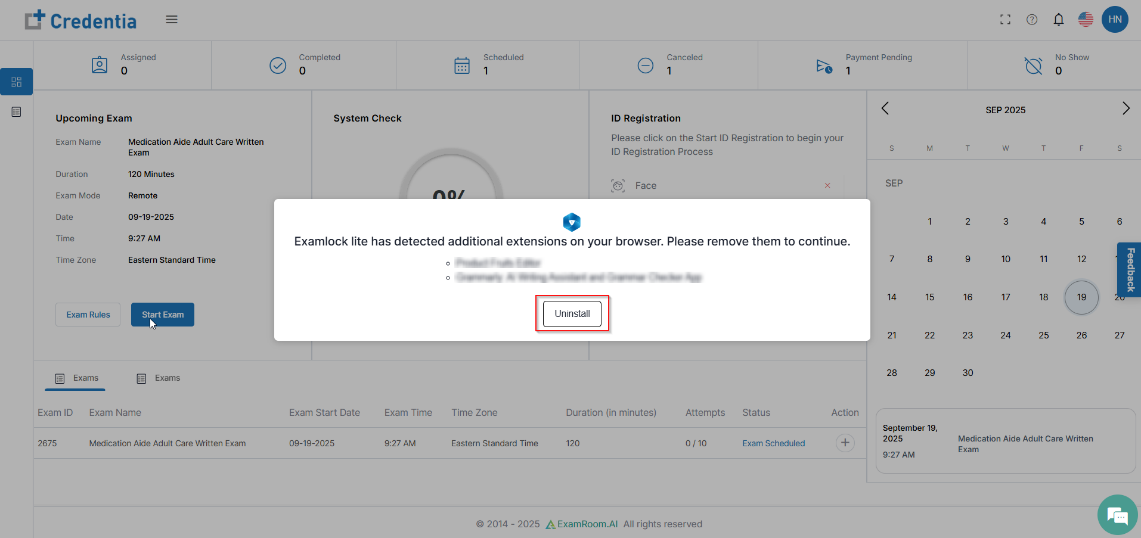
- If any other extension is detected, ensure to disable it before proceeding.
- Click Uninstall if you receive the notification to uninstall another extension.
- On the extension section, disable/remove all other extensions from the Extension window at the time of your exam session.
Note: After completing the exam, the Examlock Lite extension will be automatically uninstalled. Also, you can follow the same steps as above to visit the extensions section and remove it after your exam.
- Click Uninstall if you receive the notification to uninstall another extension.
- Once the extension is installed. Click the Start Exam button again and proceed.
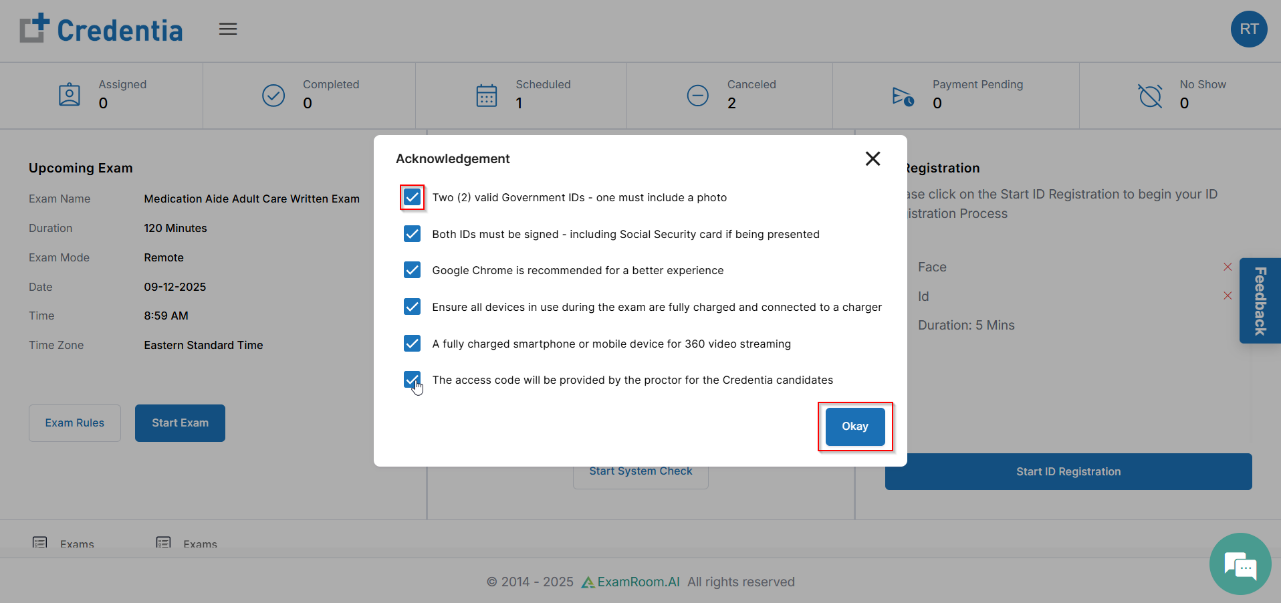
- Click the check boxes to acknowledge that you are prepared for the online exam and then click Okay to continue.
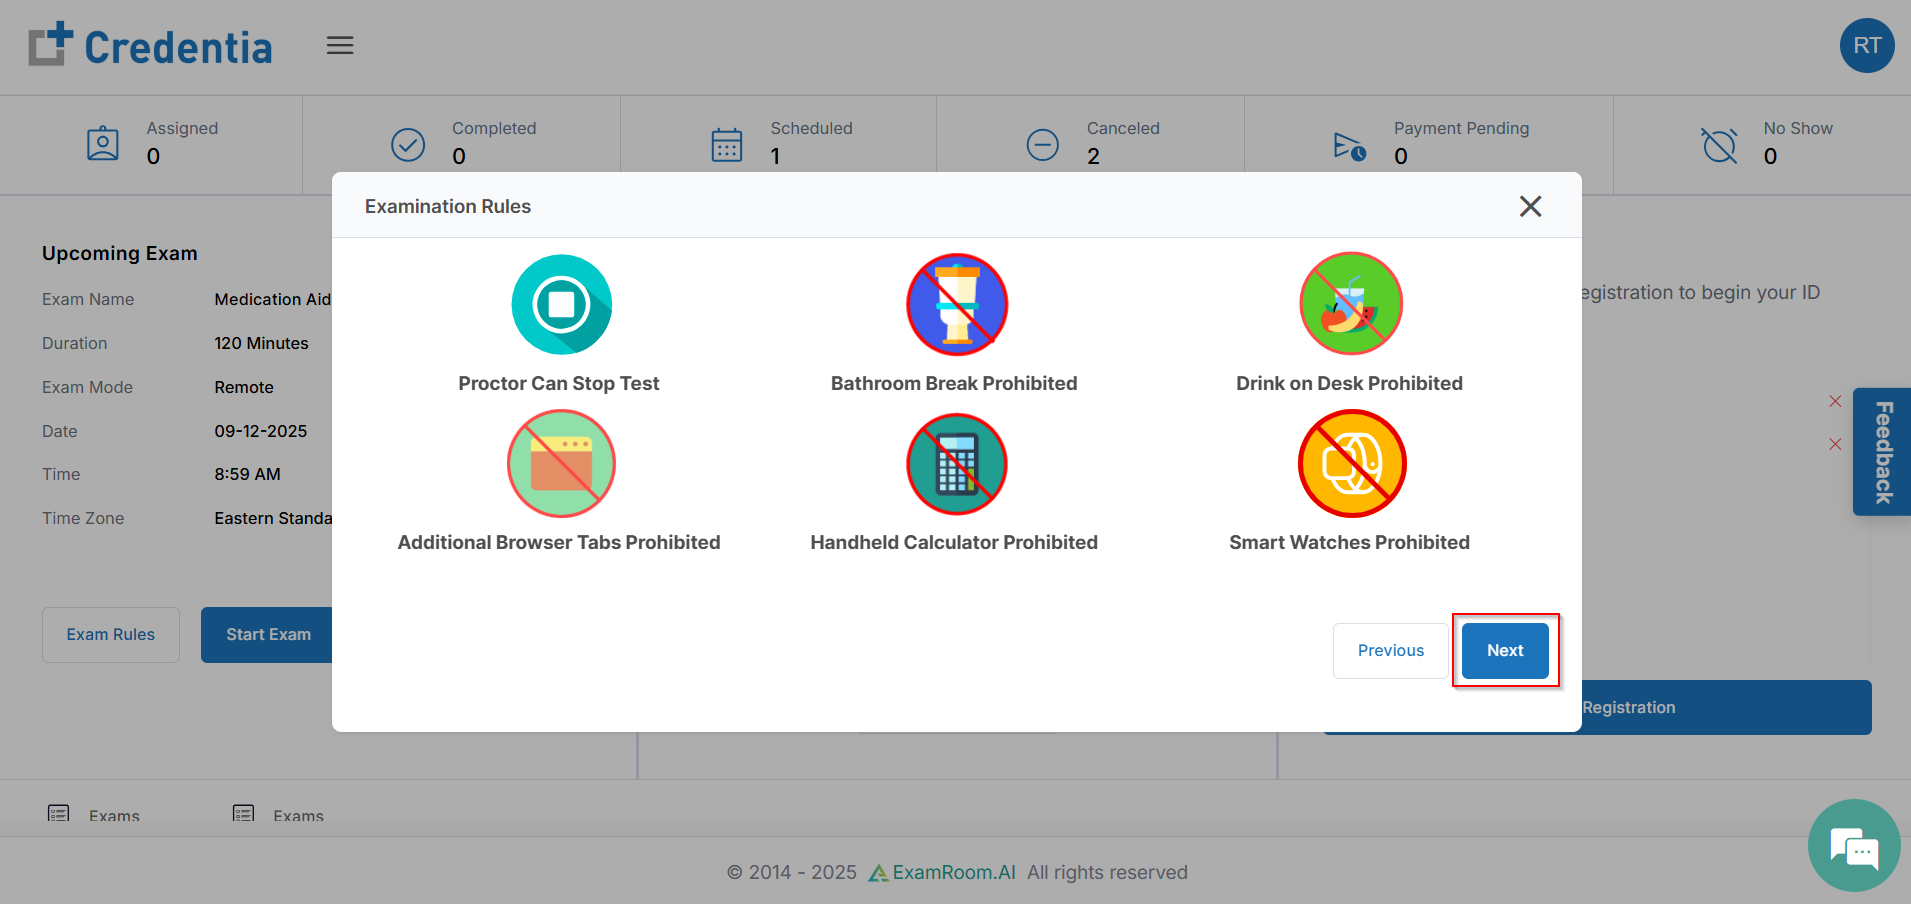
- Review the exam rules and then click Next to proceed.
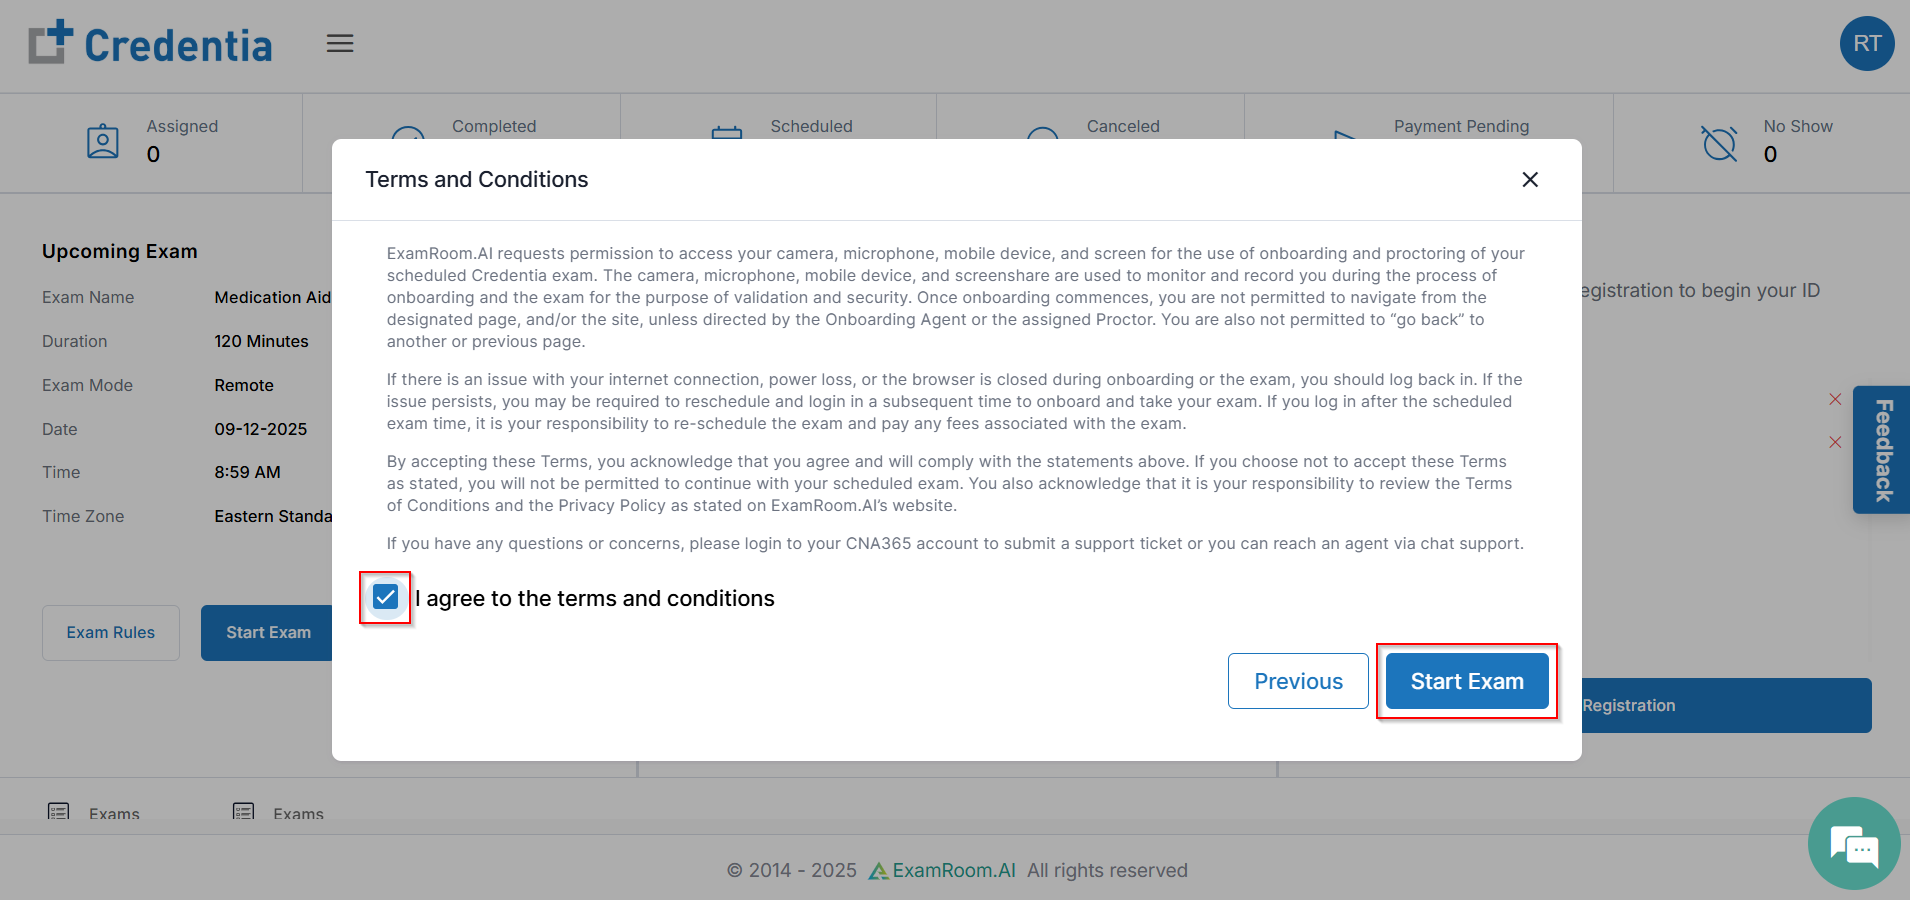
- Please review the Terms and Conditions statement and click the I agree to the Terms and Conditions box, then click Start Exam.
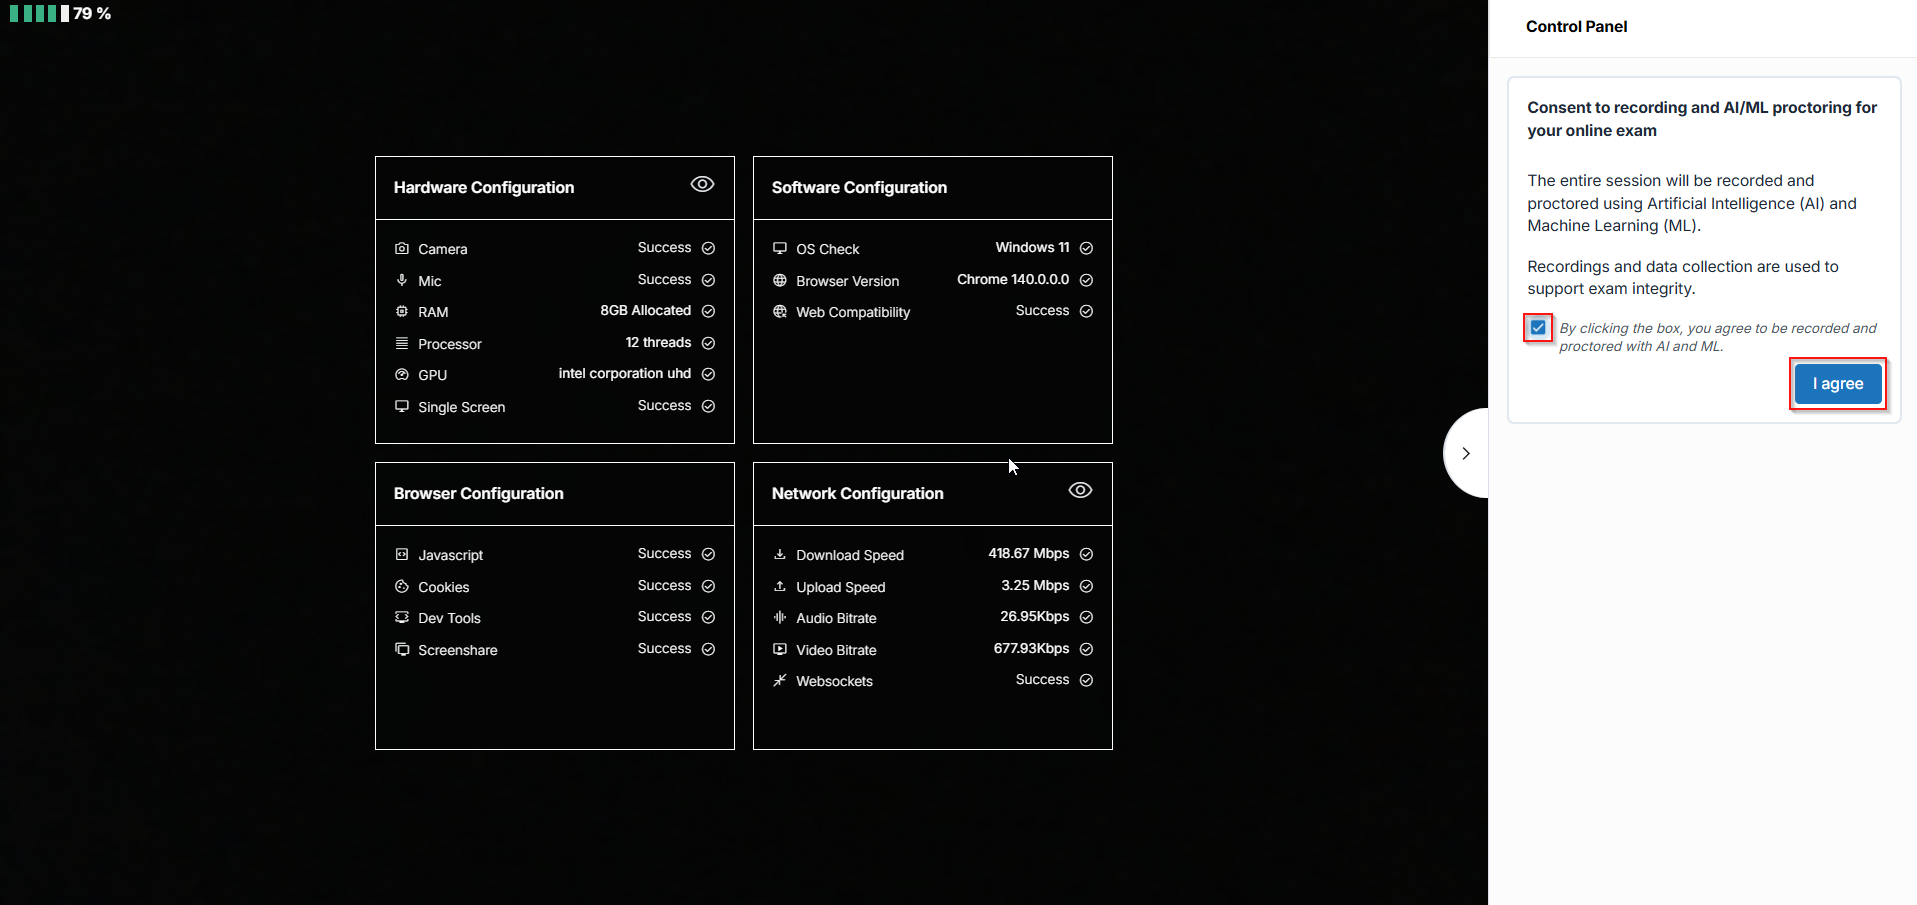
- After clicking the Start Exam button, you will be directed to a system check that will analyze the hardware, software, browser, and network system configurations. When completed, click the box to provide consent for recording and AI/ML proctoring, then click the I agree button.
Onboarding for Your Exam
During the onboarding process, you will be connected with an Onboarding Agent (OBA) who will walk you through the steps to verify your system, face, ID, environment, and rules before transferring you to a proctor.
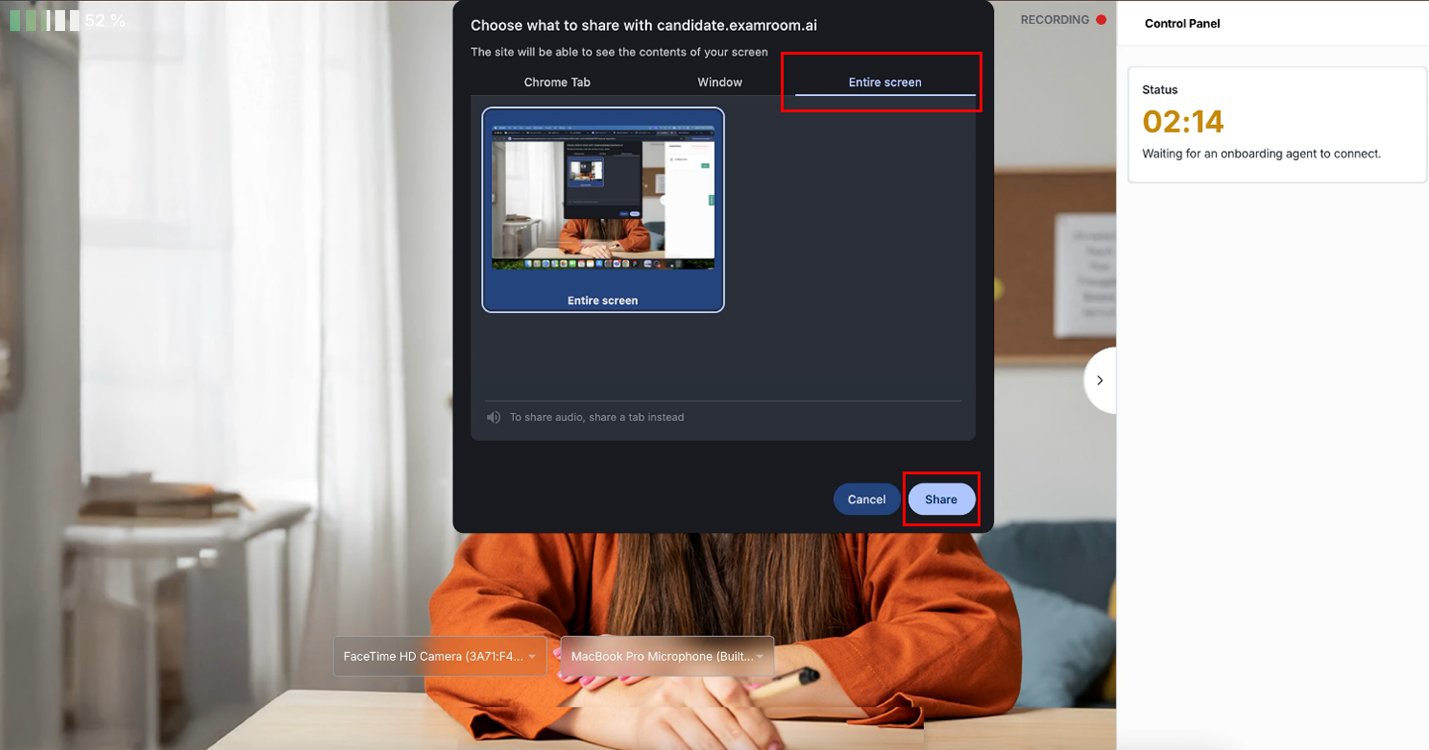
Sharing Your Screen
- Select the Entire Screen option, click the entire screen image in the box, and then click Share to share your entire screen with the OBA and proctor.
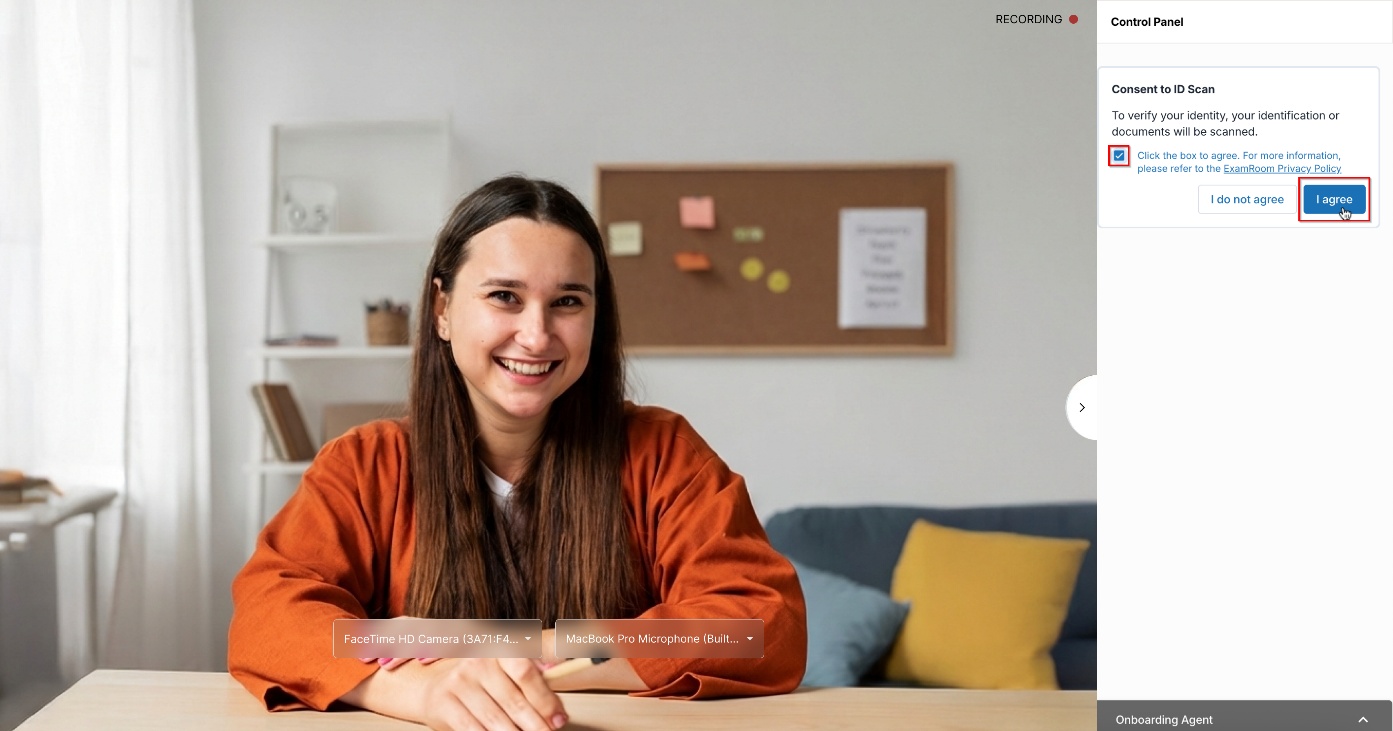
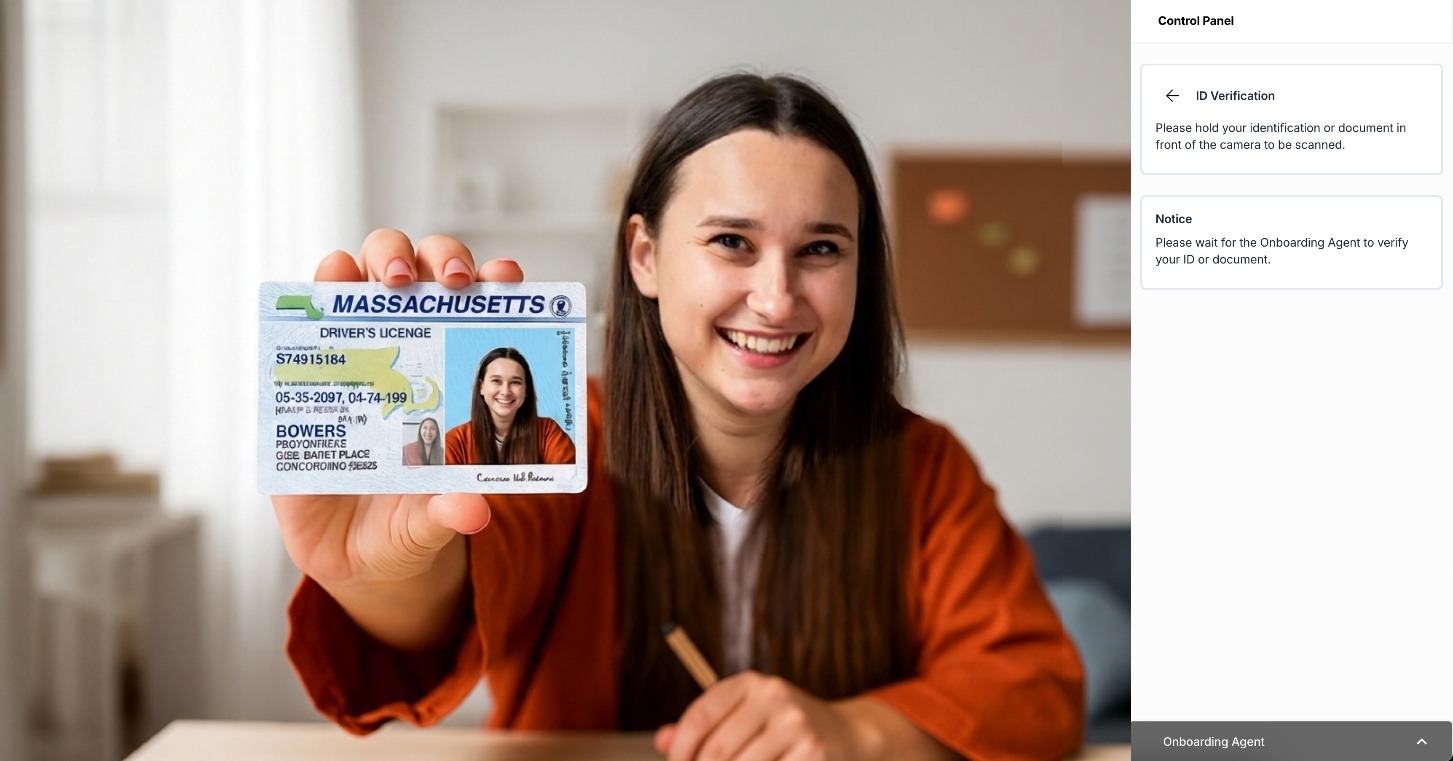
ID Verification
- To start the ID verification step, please click the box to provide consent, then click the I agree button in the Control Panel located on the right-hand side of the screen.
- Hold your government-issued photo ID and/or other form of approved identification in the camera so that the agent can verify the information.
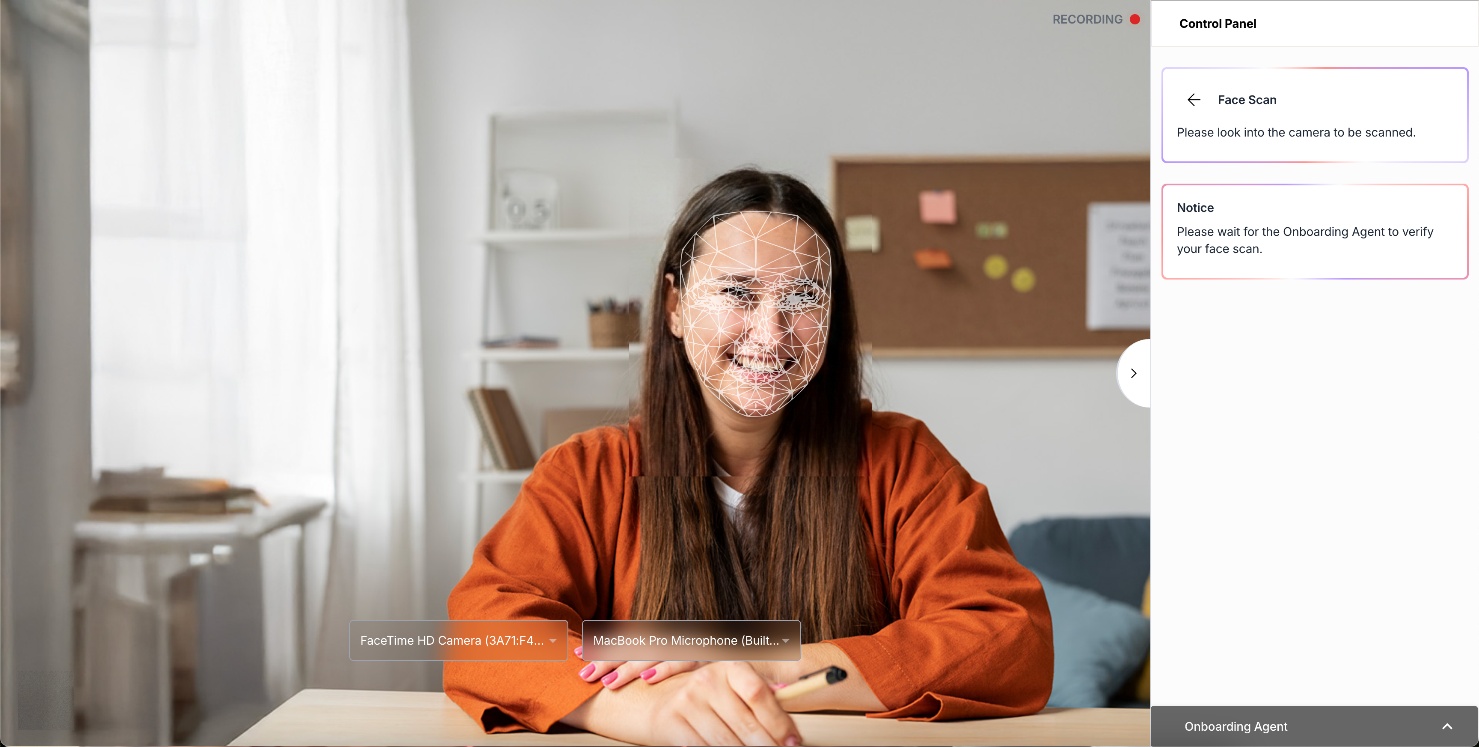
Face Verification
- To start the face verification step, please click the box to provide consent, then click the I agree button in the Control Panel located on the right-hand side of the screen.
- As directed by the OBA, look directly into the camera while a photo of your face is taken.
- Once your ID and Face verification are completed, you will proceed to the next step.

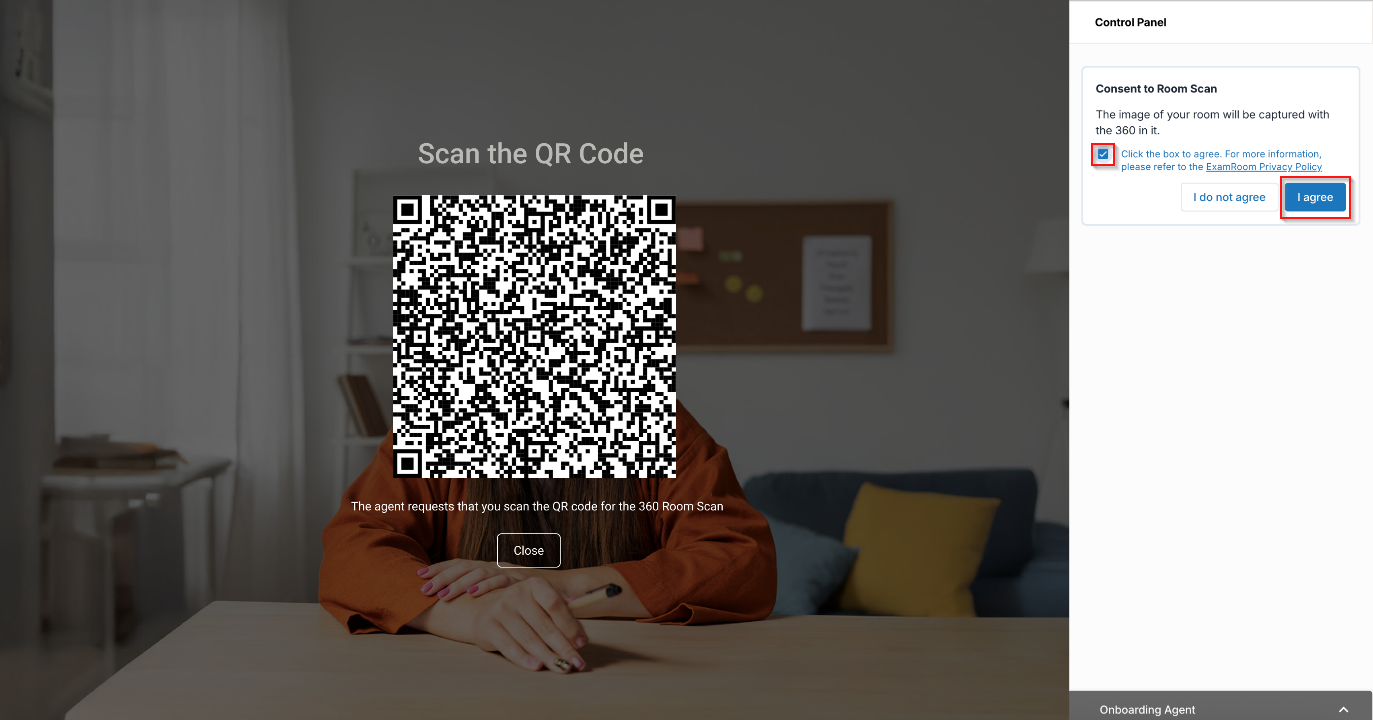
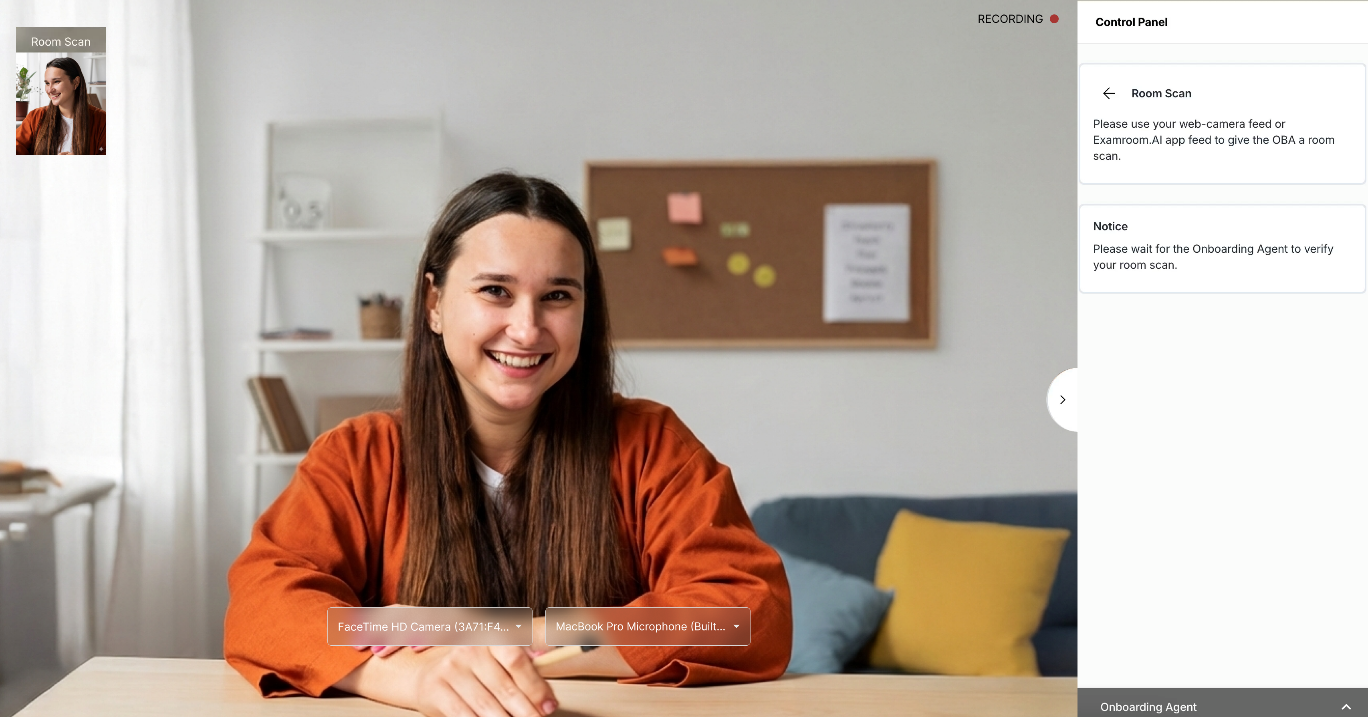
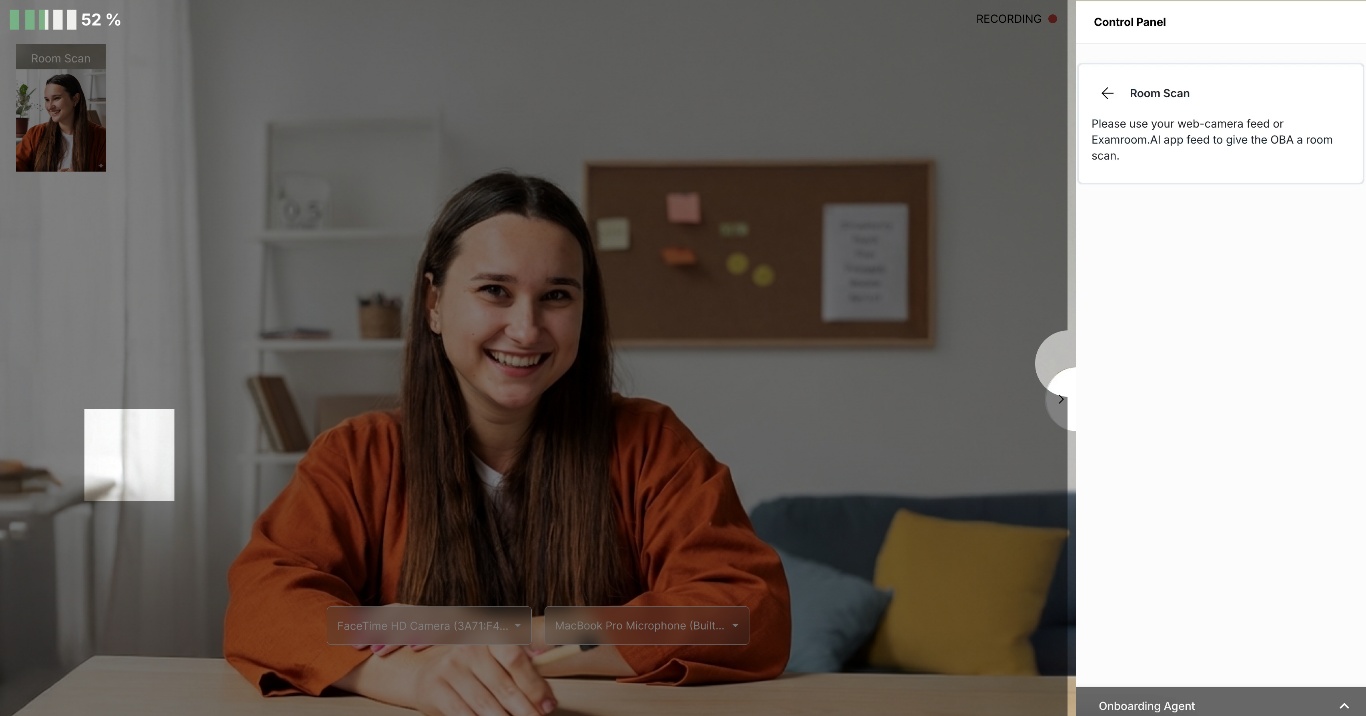
Exam 360 & Room Scan
- To initiate the Room scan and Exam 360 view using your Android/iPhone, click the check box to provide consent, then click the I agree button in the Control Panel on the right-hand side of the screen.
- Scan the QR on the screen from your smartphone/device.
- You will be connected to a video stream through your smartphone to provide a room scan. Follow the instructions provided by the OBA and show your testing area and the room using your Exam 360 device.
- Follow the instructions provided by the OBA. You will need to place your device in the area requested by the onboarding agent.
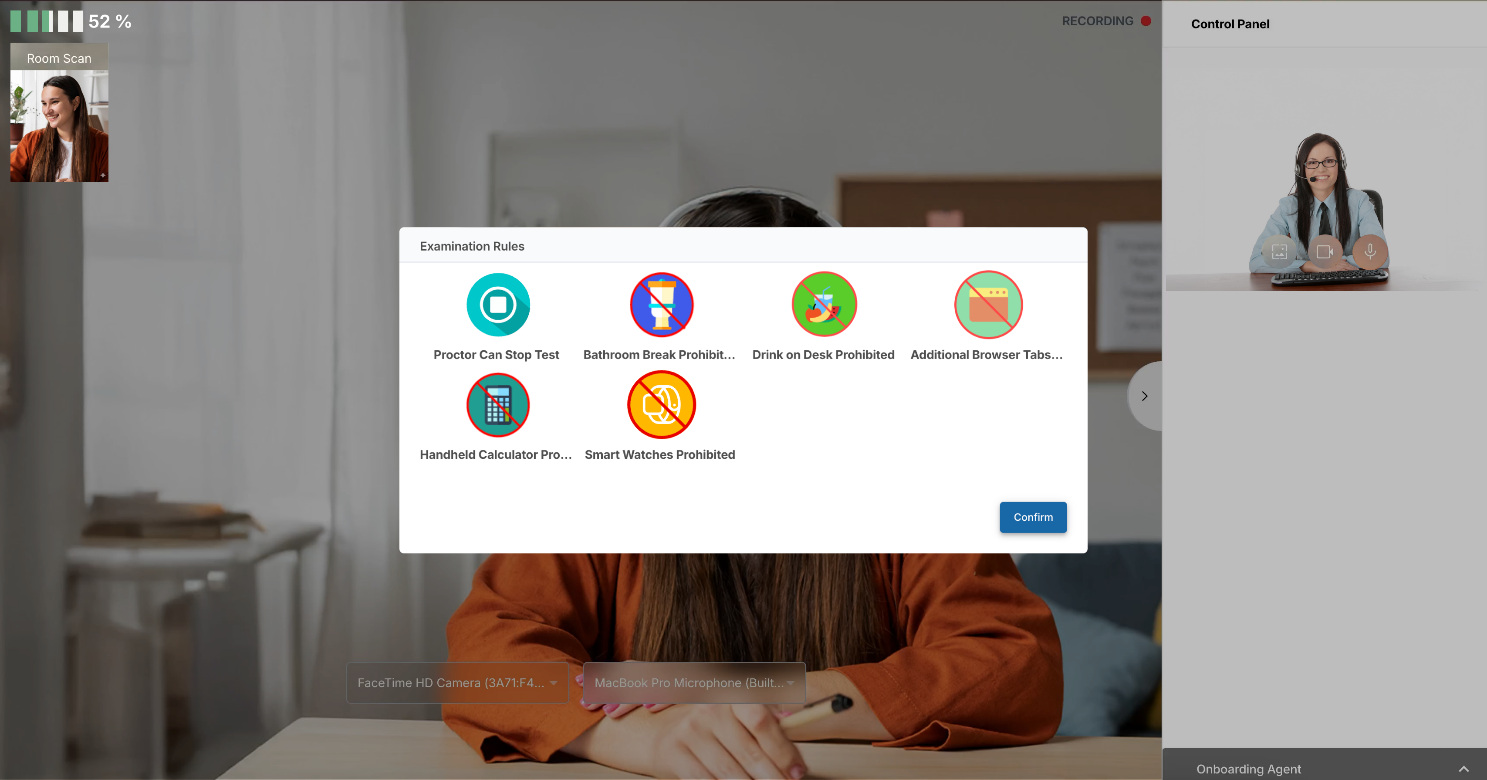
Exam Rules and Instructions
- After the room scan is complete, you will review the exam rules. When you are done reviewing the rules, click Confirm.
- After you have completed the onboarding process, the OBA will transfer you to the proctor.
Taking the Exam
- After being connected to the proctor, the test console screen will appear. A pop-up will prompt you to enter full-screen mode. Click Allow to continue.
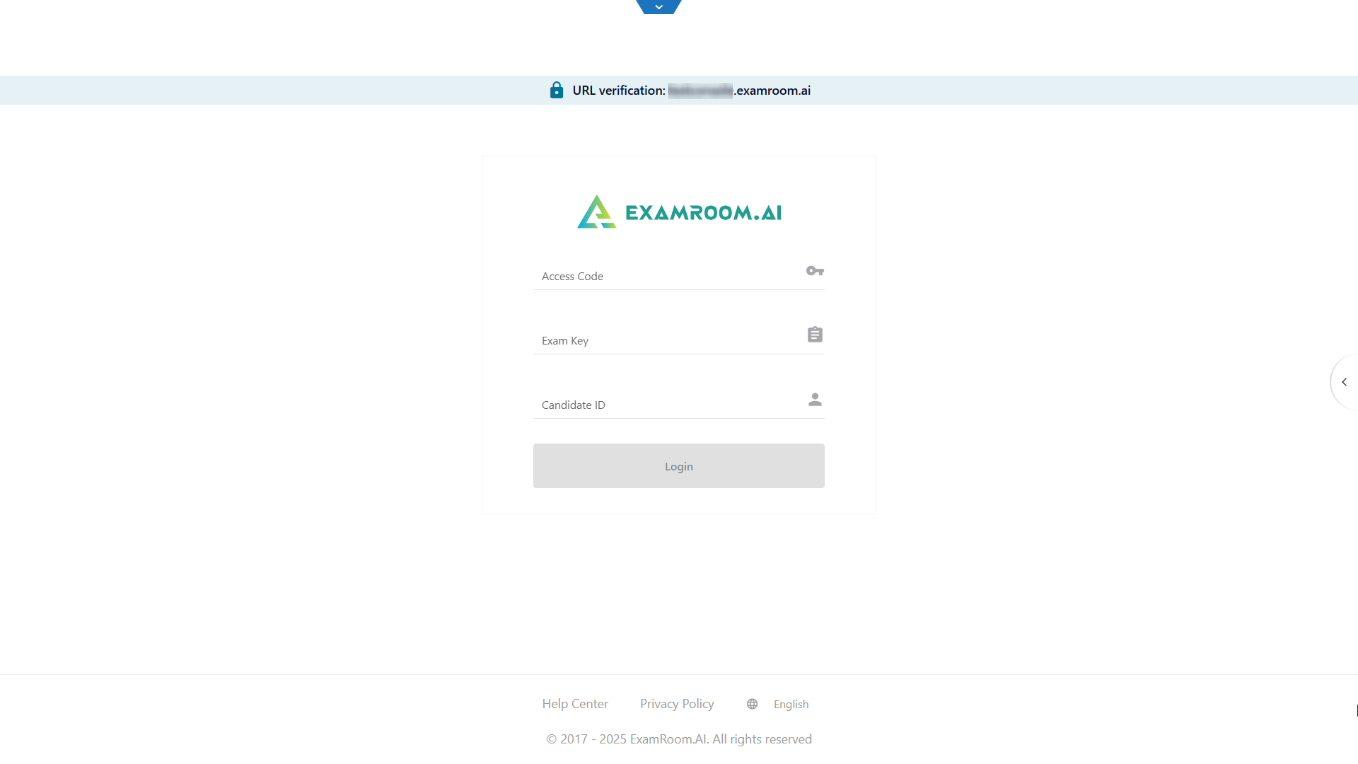
- When the test login screen appears, please wait for the proctor to complete the Access Code, Exam Key, and Candidate ID fields. The proctor will then enable access to your exam.

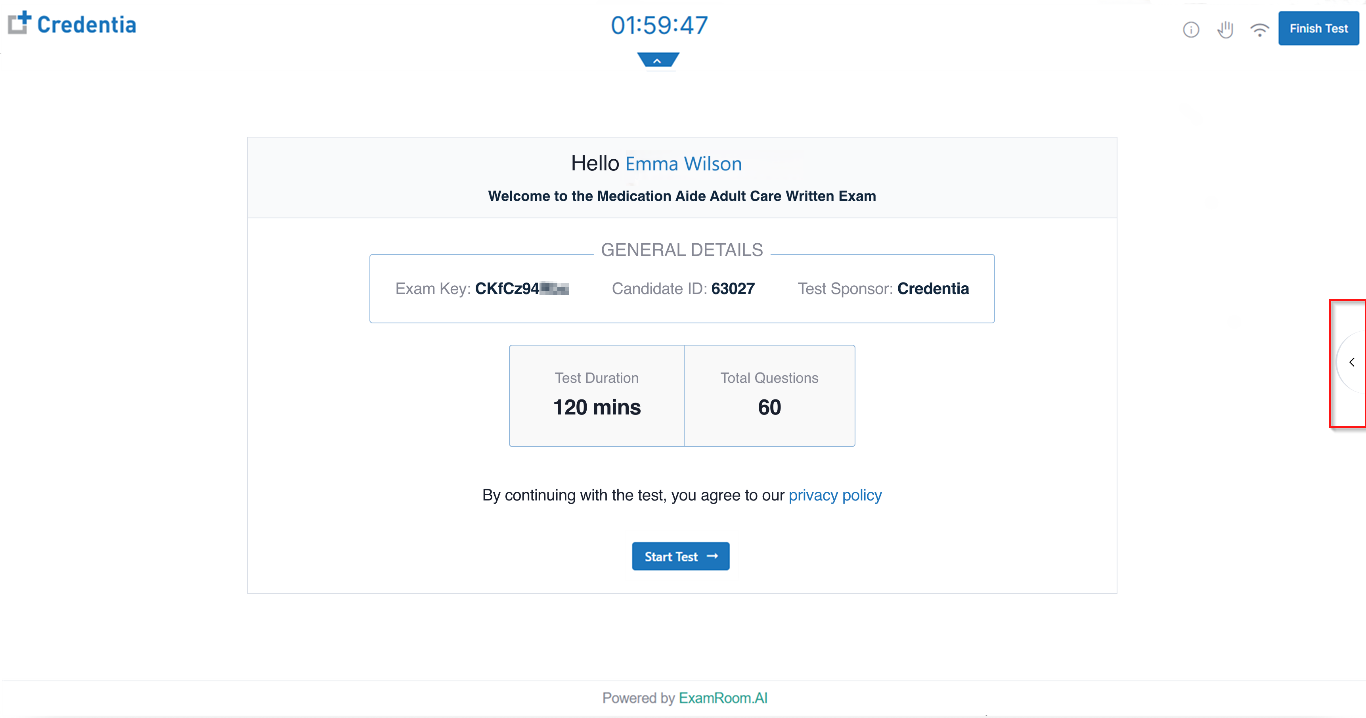
Exam General Details
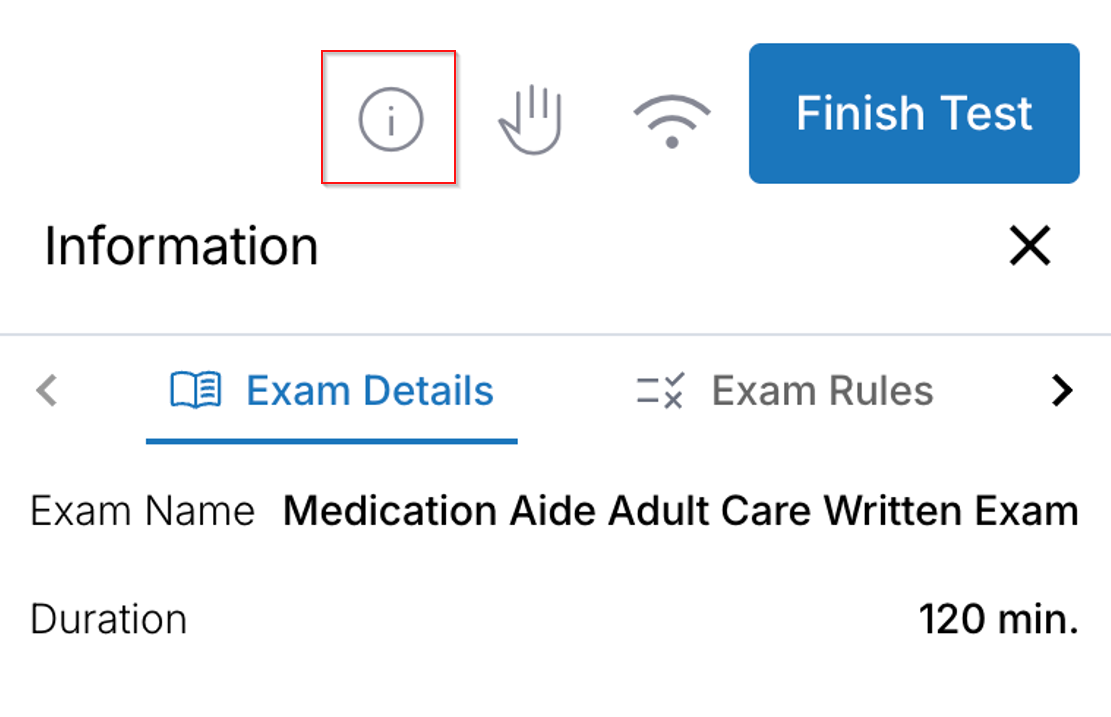
- The Welcome Screen appears, displaying the exam details. Click the arrow icon on the right-hand side to chat with the proctor during your exam.
- Click the arrow icon at the top of the screen to open the drop-down menu, which includes:
- The Proctor Session duration is shown. (This timer indicates the total time taken for your exam process, including onboarding.)
- Information icon (you can view exam details, Exam Rules, and Instructions mentioned for your exam).
- Hand icon to raise a hand to speak with the proctor.
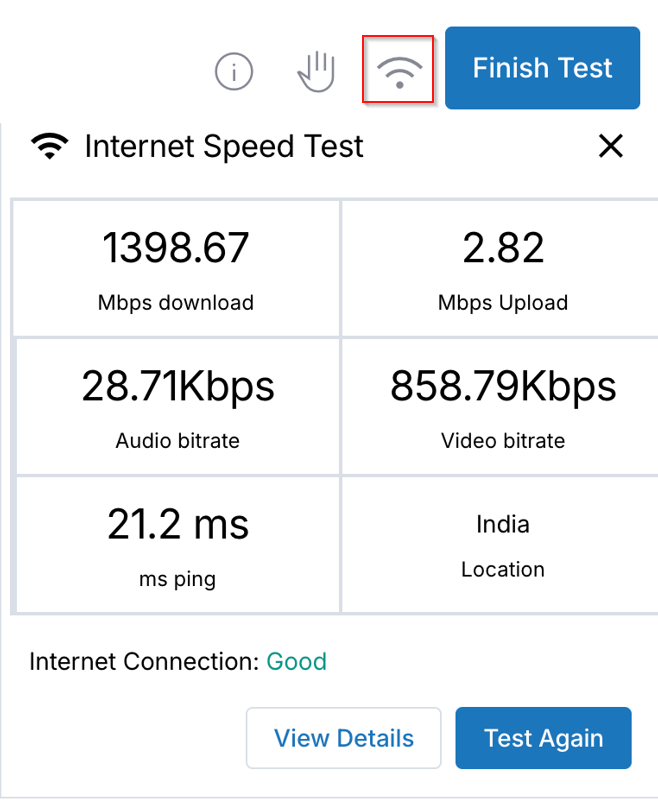
- Wi-fi icon to check signal strength.
- The Finish Test button closes your scheduled session with the proctor. Make sure to click on the Finish Test only after you have submitted your exam.
- The Proctor Session duration is shown. (This timer indicates the total time taken for your exam process, including onboarding.)
- When you are ready to answer the exam questions, click Start Test.


Taking the Exam
- During your exam, you will have access to certain features.
Note: - If you need to contact the proctor during the exam, open the sidebar by clicking the arrow on the left side and then access the chat window to communicate.
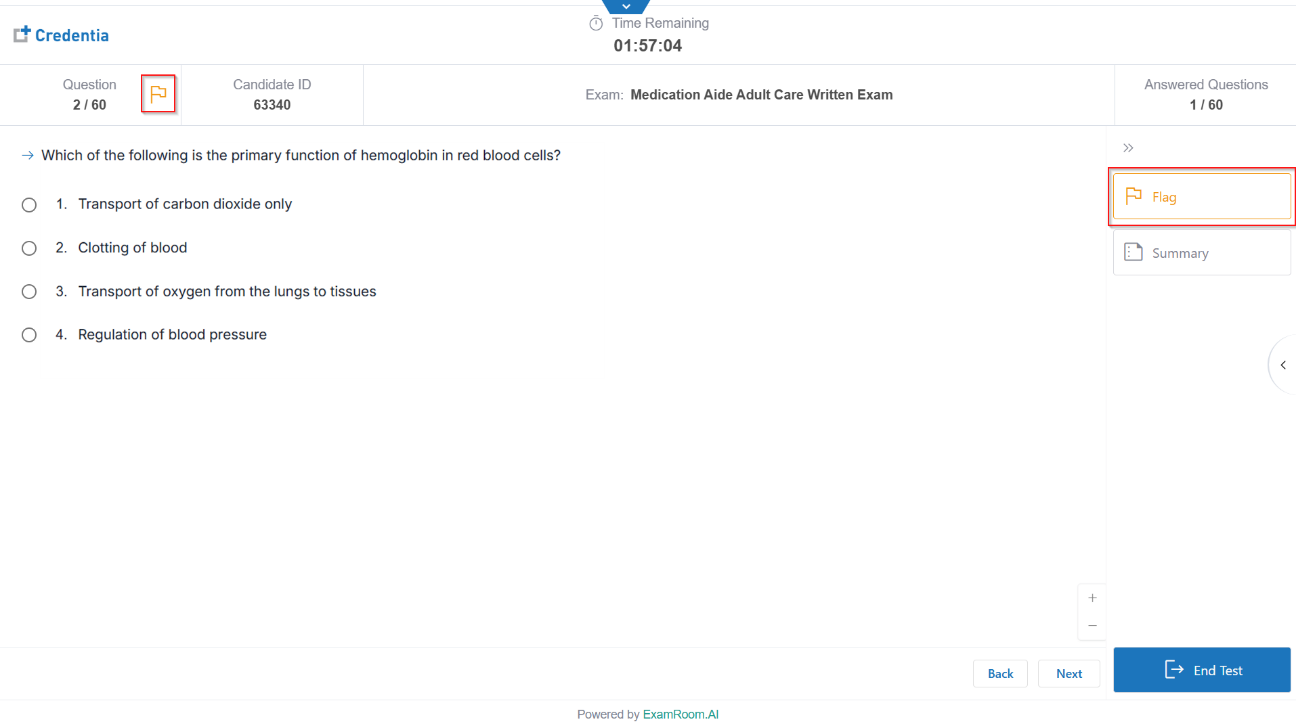
- On the right-hand side of the screen, click the double arrow icon to open the widget toolbar.
- From the widget toolbar, you can flag items/questions to revisit later.
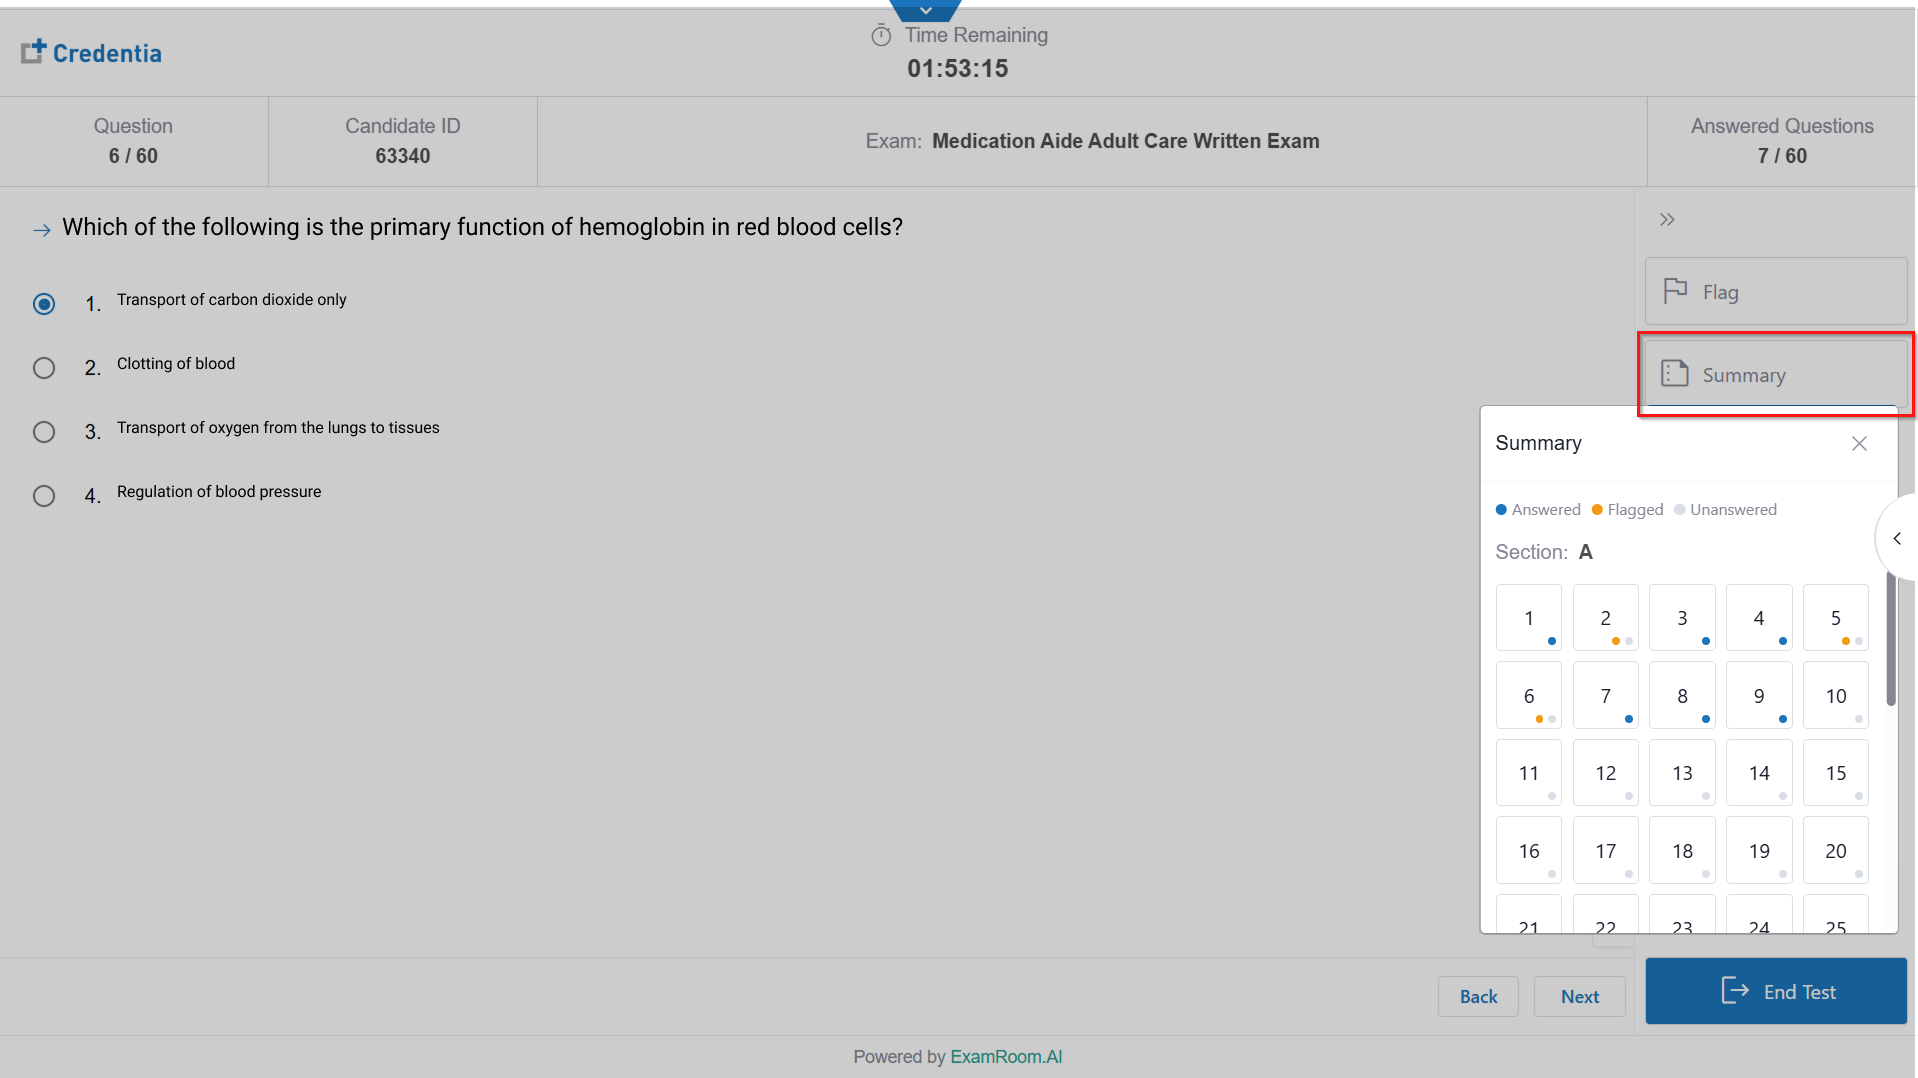
- Click Summary to review exam progress and flagged items/questions.
- Here, you can click on question numbers to directly navigate back to the desired items or questions.
- The answered questions are indicated with a blue dot.
- The unanswered questions are indicated with a gray dot.
- Questions indicated with an orange dot are flagged.
- To close the widget toolbar, click the double arrow icon.
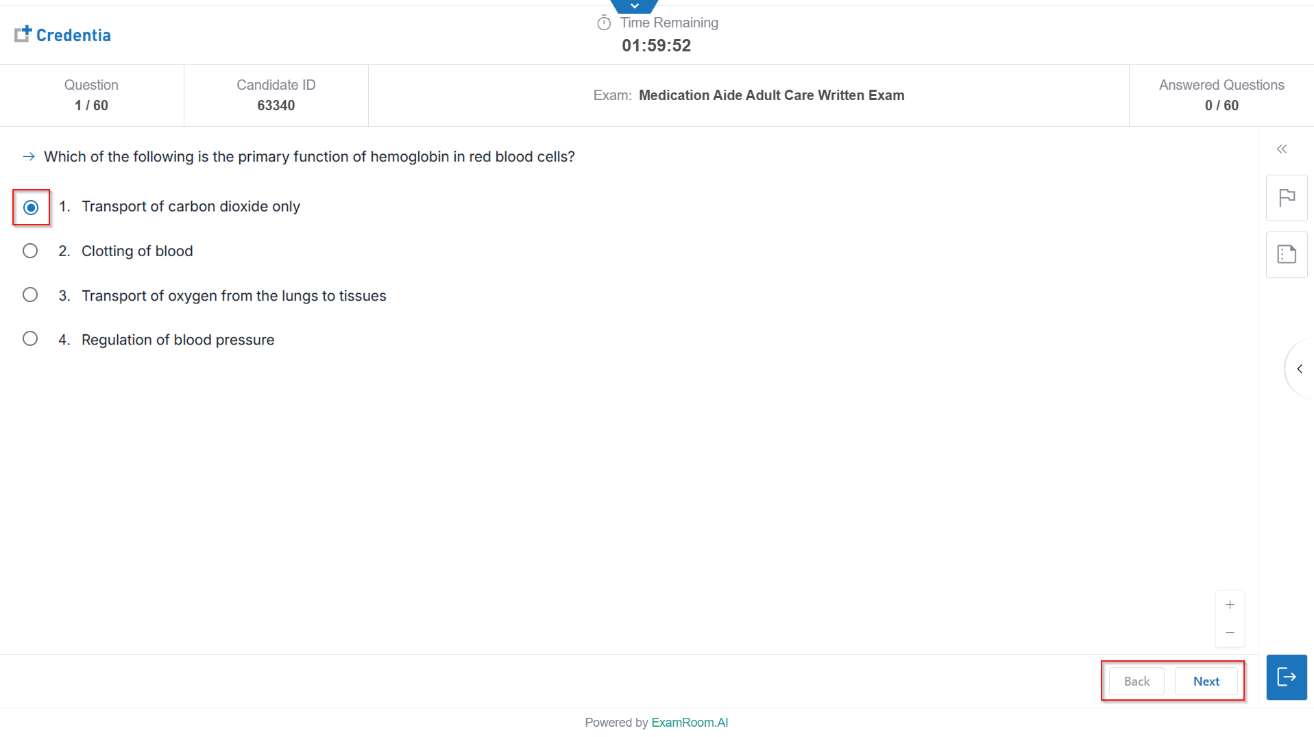
- To answer a question, carefully review the question and all answer choices, then select your response.
- Click Next to move forward. Click Back to return to the previous question.
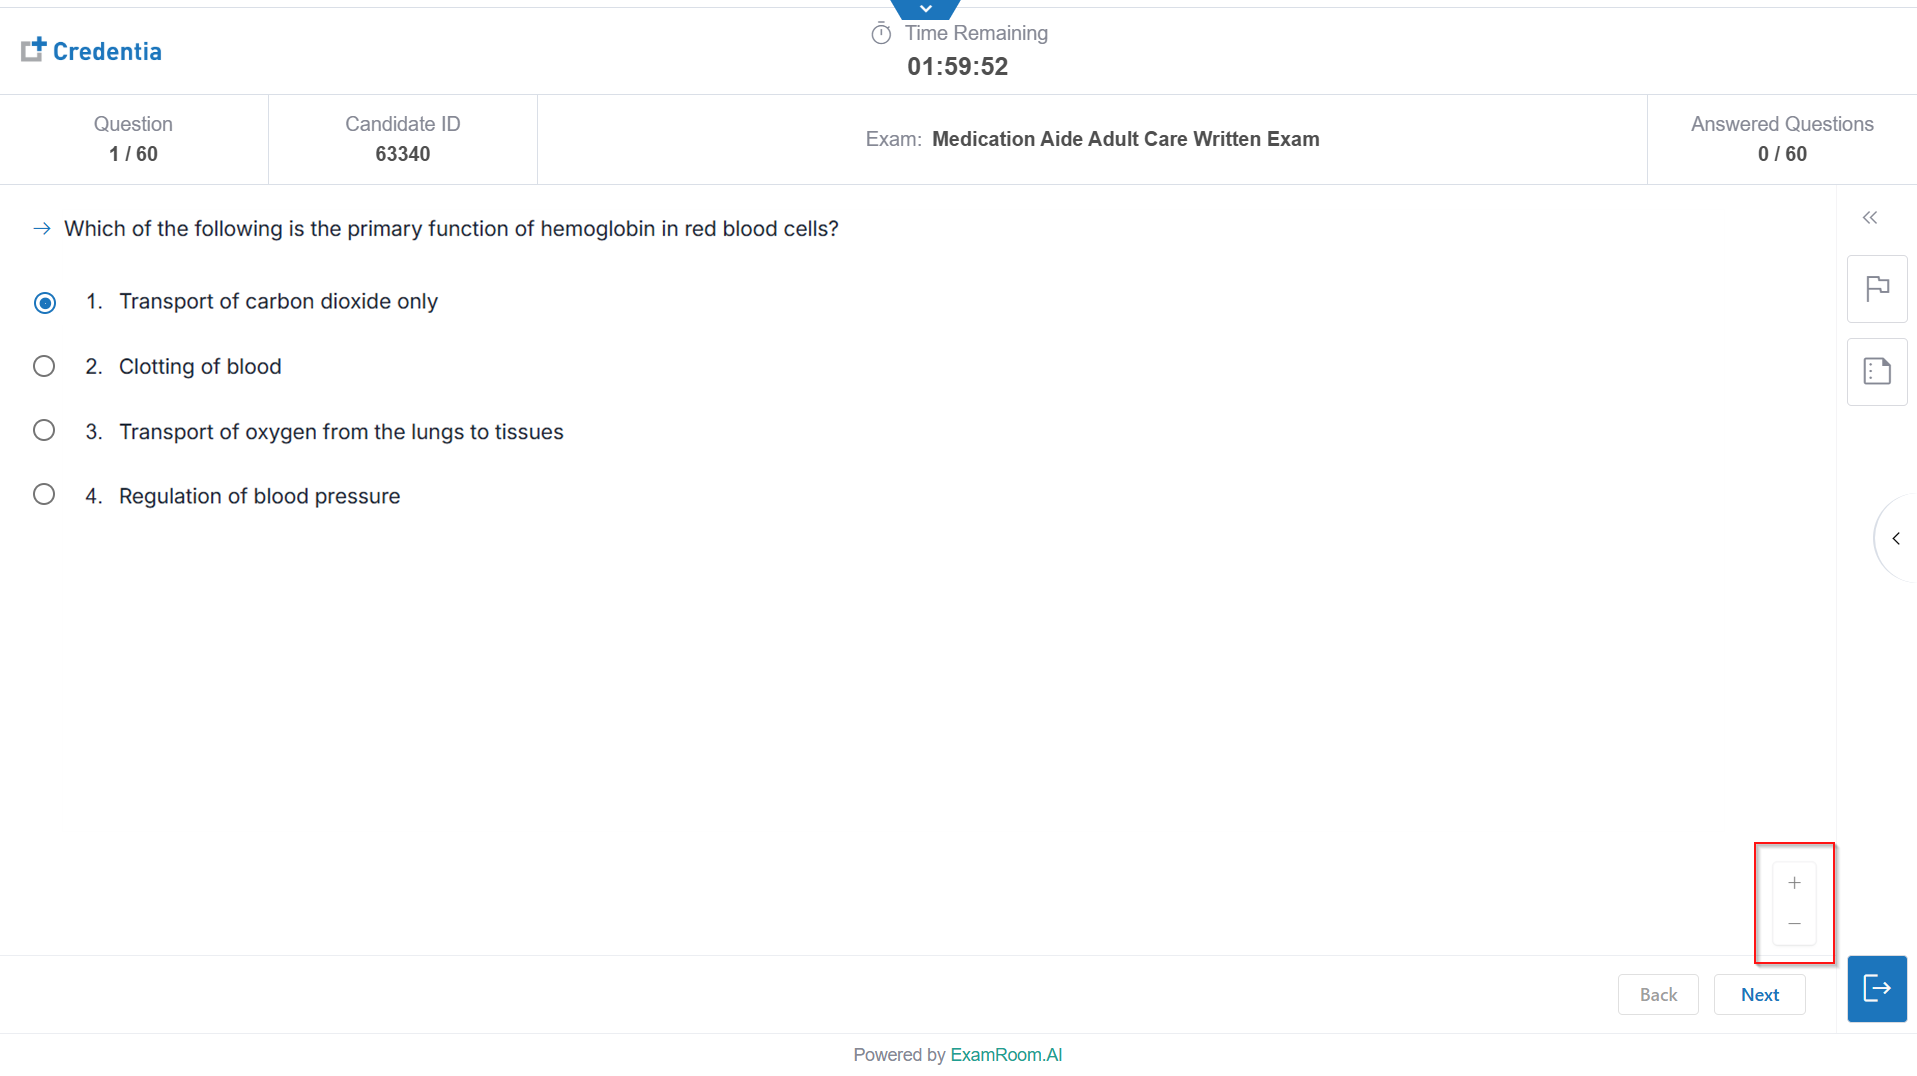
- You can zoom in and out of the Question using the plus and minus buttons at the bottom right side. Click on the plus to maximize the font size of the question. Click on the minus to reduce the font size of the question.
Note: If your laptop's battery is low, you will receive a notification. Keep your laptop charged and ensure the power cable is connected.
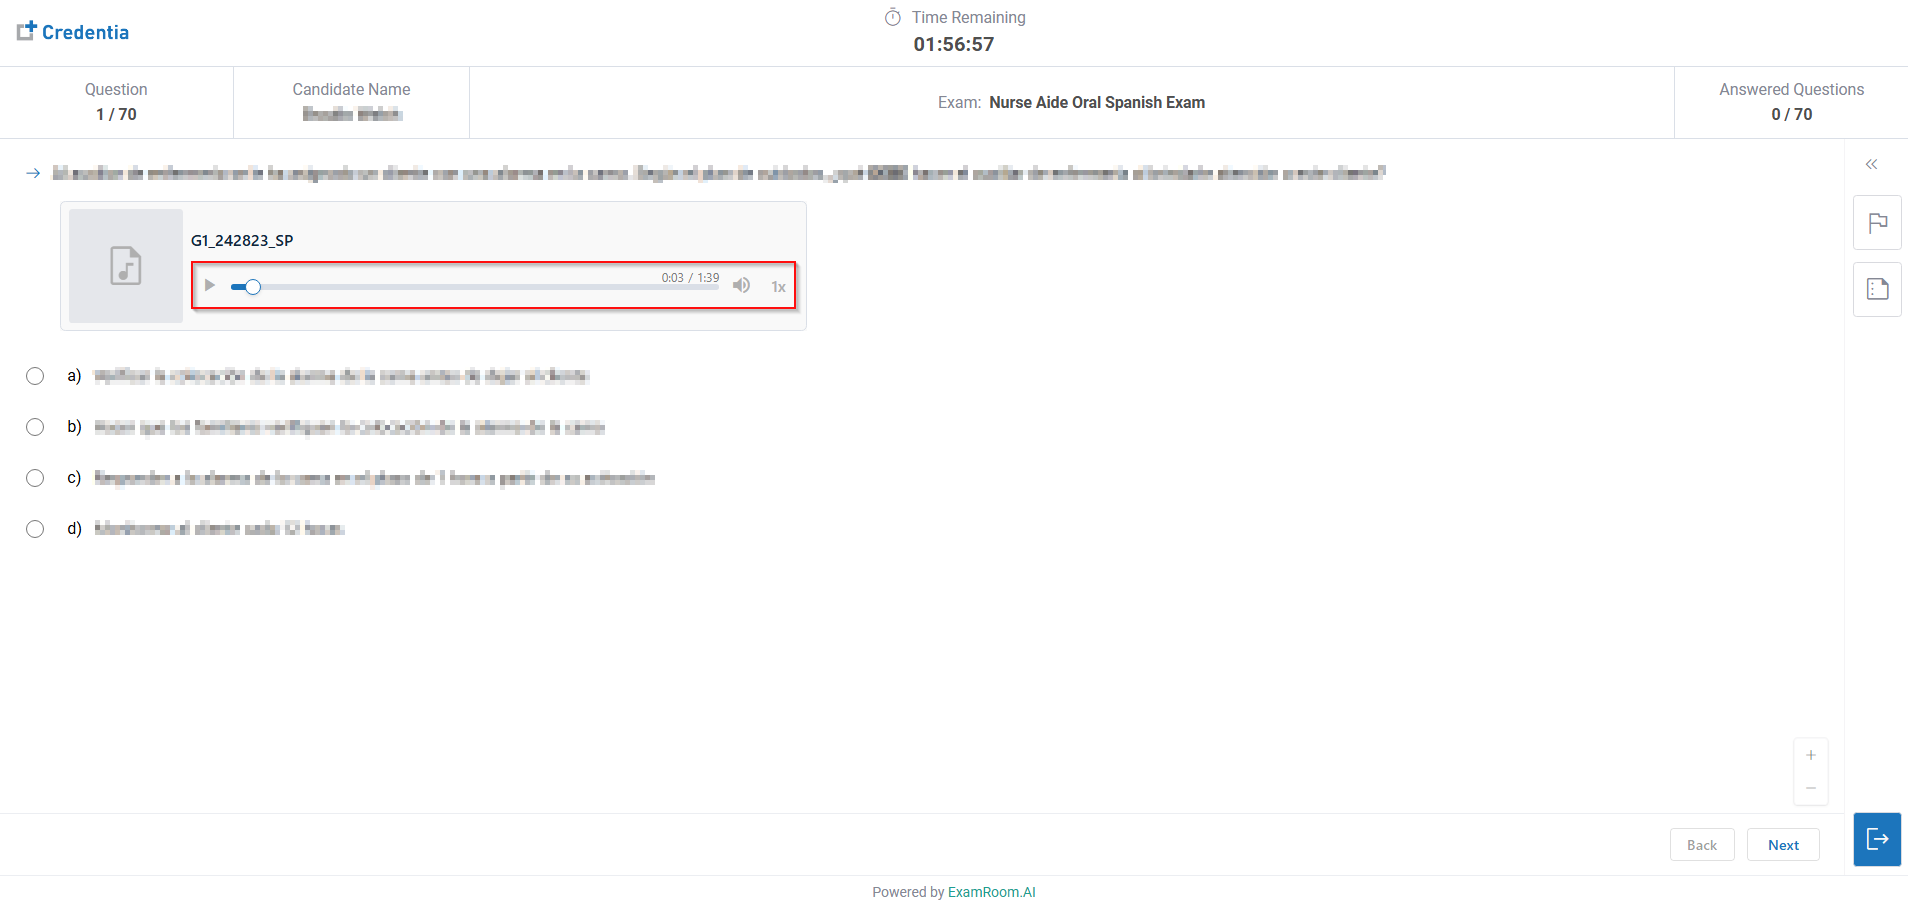
- If you choose the Oral exam, you can listen to the questions by playing the audio in the question section.
- Click the Play/Pause icon to listen to the full question.
- Click and hold the Cursor forward or rewind to navigate.
- Click the Speaker icon to mute or unmute the audio.
- Use the Playback option to adjust the playback speed as desired.


Ending Your Exam
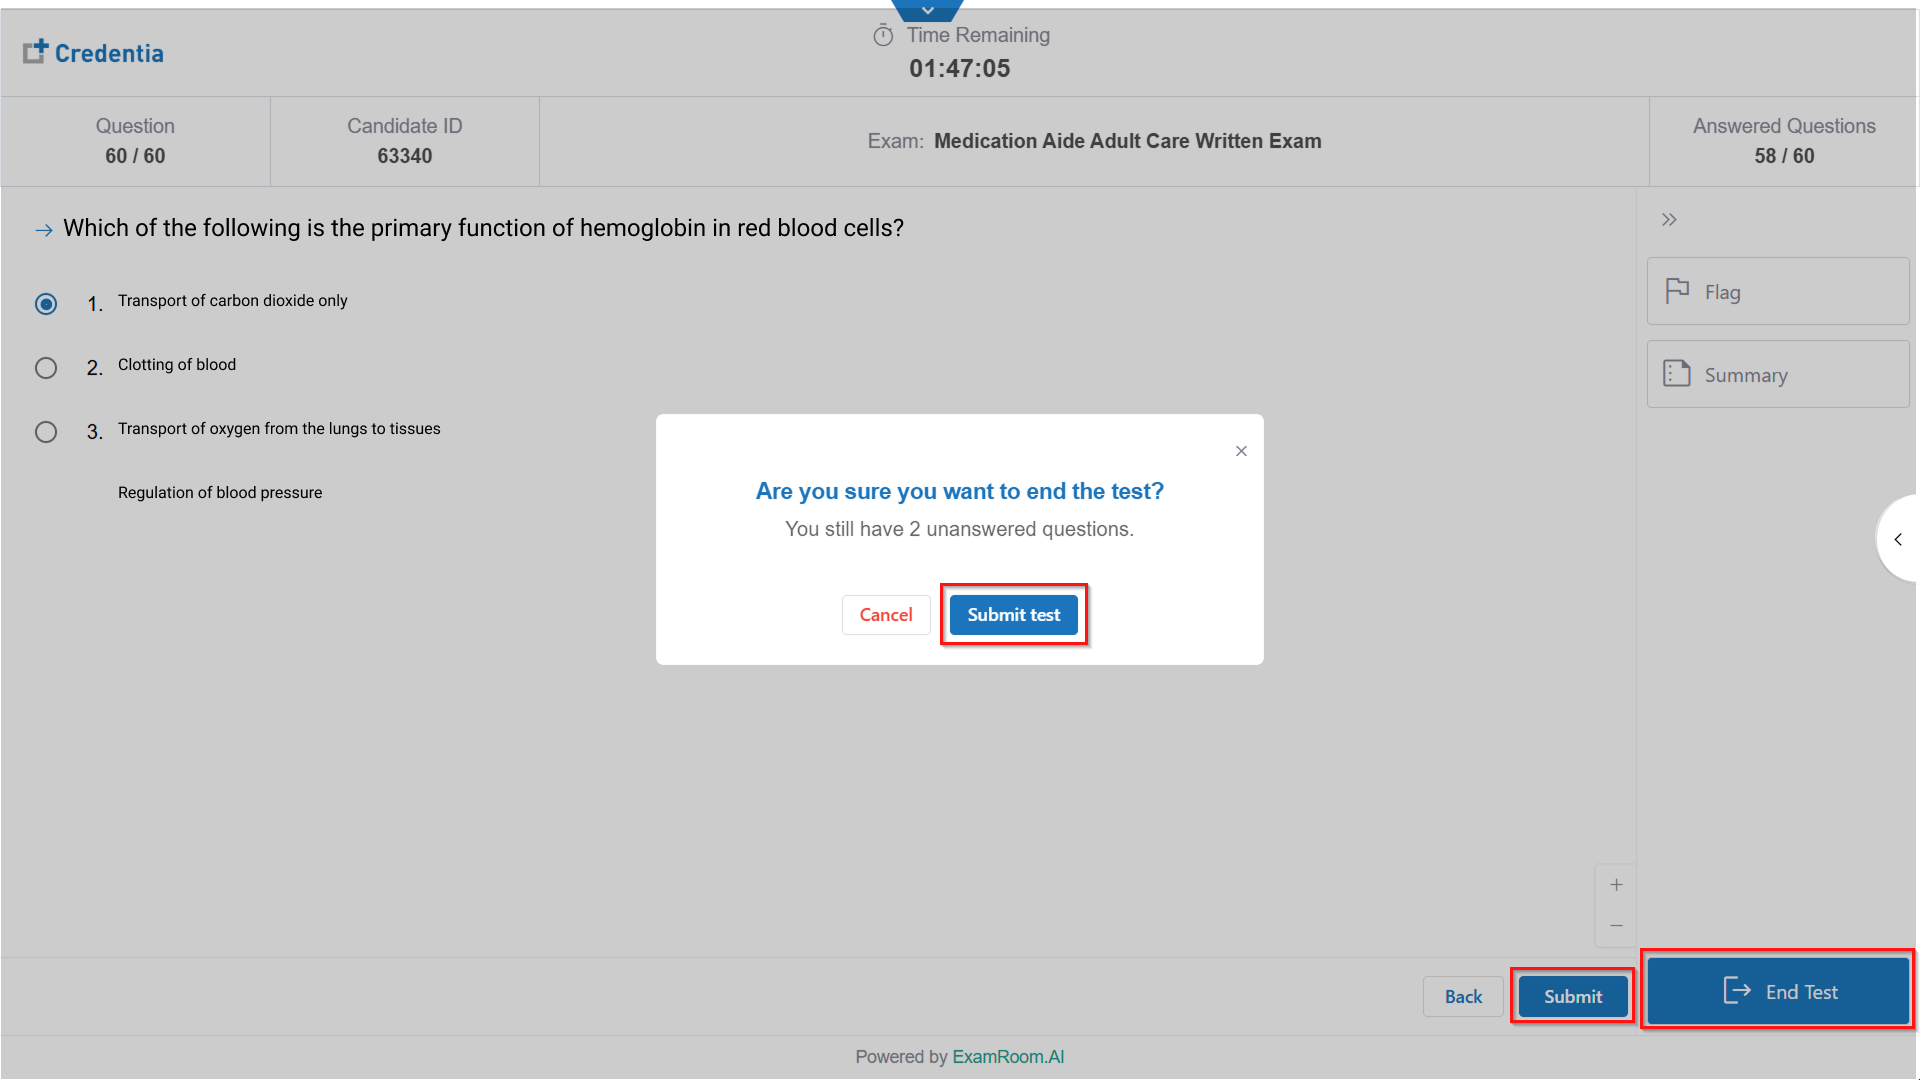
- After answering all questions, you can submit your exam by clicking Submit, which is provided at the last question, or by clicking End Test, available in the side widget section.
Note: Keep an eye on the answered question, count in the top info bar, or refer to the summary for a quick overview. When you finish your test, the confirmation box will indicate whether you have any unanswered questions. - After clicking Submit/End Test, click Submit Test to confirm the submissions. Otherwise, click Cancel to return to the exam.
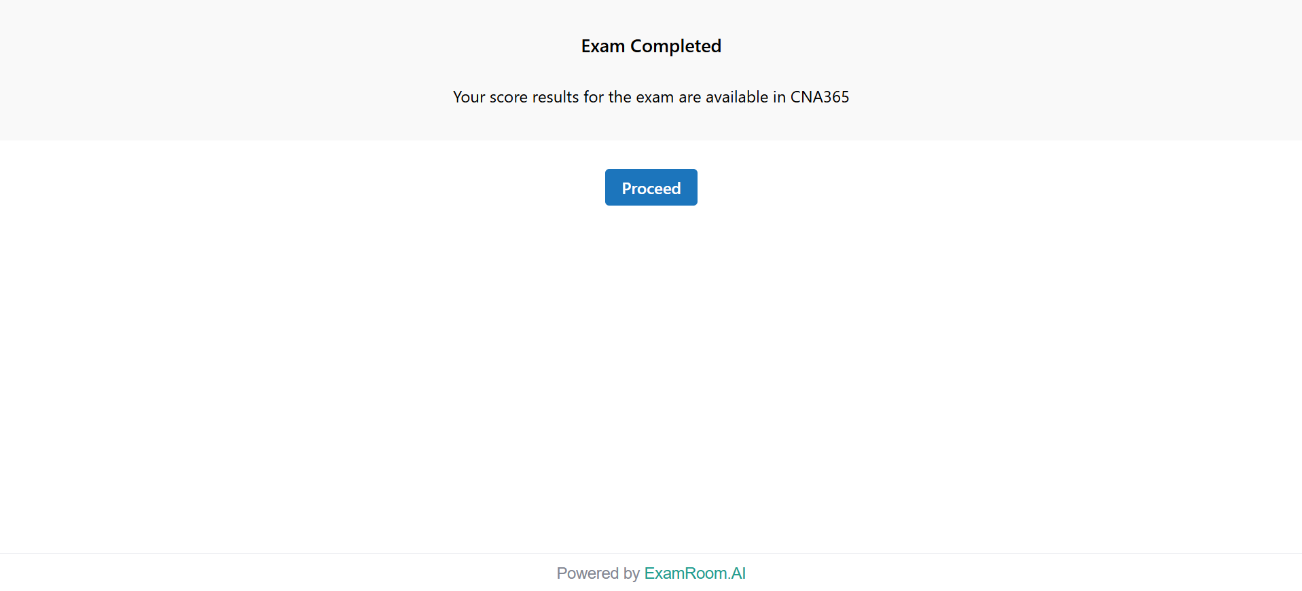
- After submitting, you may see an exam result preview or exam completion notification. Click Proceed.
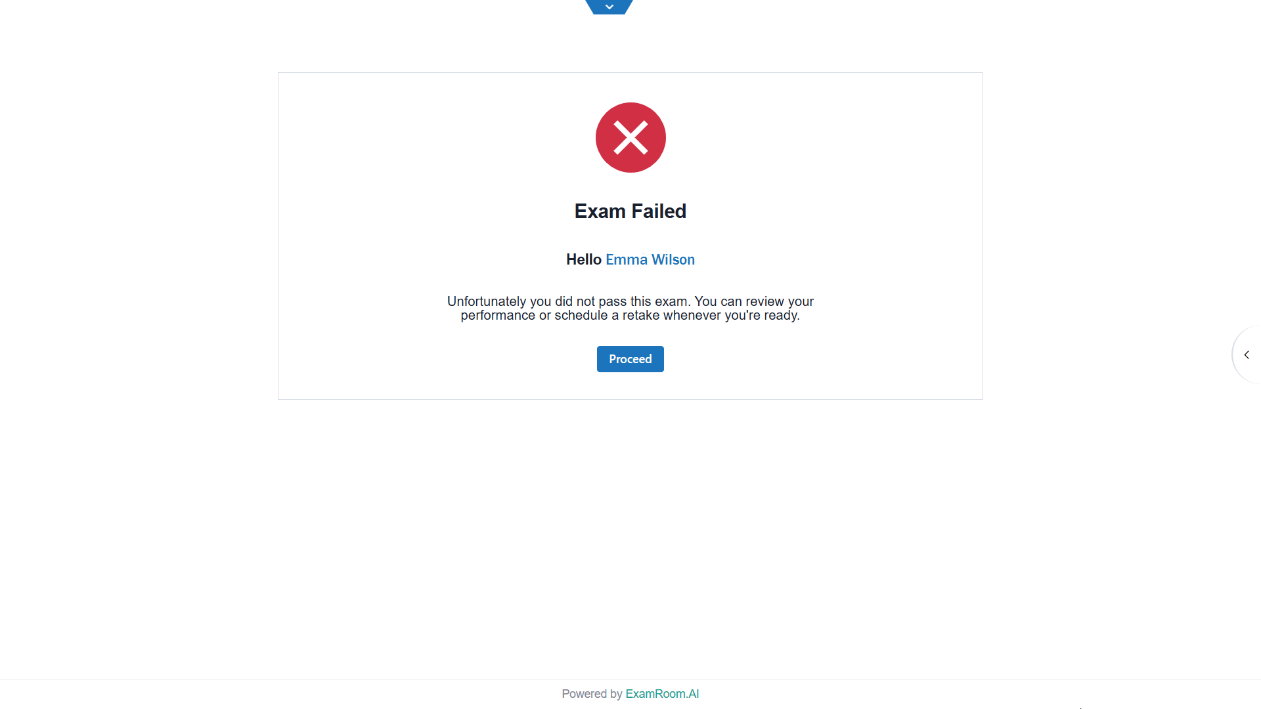
Note: You can view and download your results from the dashboard. - If you have attended the online written exam, below is a preview of an example result of the written exam. Click Proceed.
- If you complete the Oral exam, a notification confirming the exam's completion appears. Click Proceed.
- If you have attended the online written exam, below is a preview of an example result of the written exam. Click Proceed.
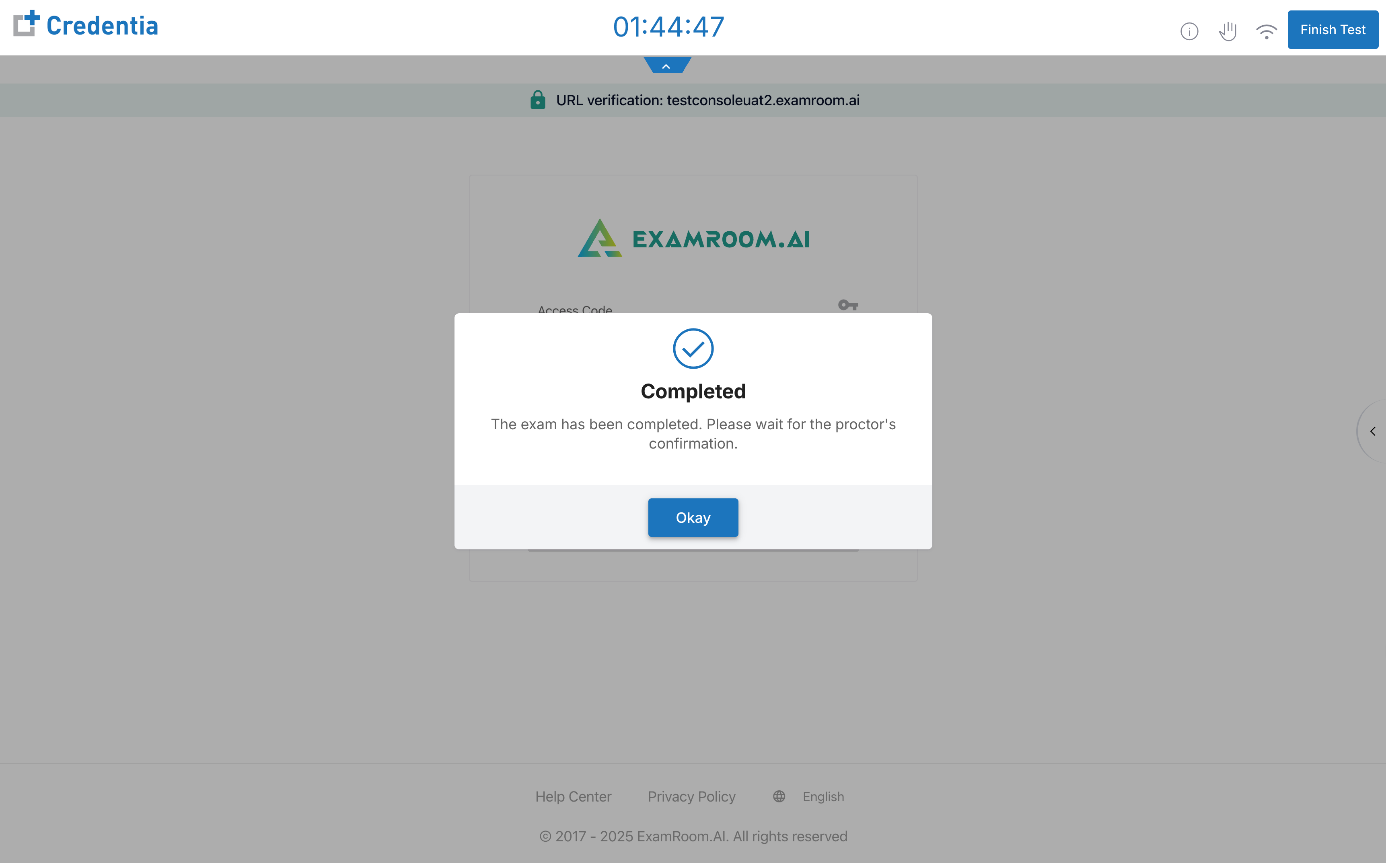
- After completing the exam, click Okay and wait for the proctor to confirm and end the session, and once confirmed, the test console window will be automatically closed, and you will return to your dashboard.
Note: The proctor will automatically remove the Examlock Lite extension after the exam is completed. You can also refer to the Examlock Lite section to remove it.